And The Controversial Lewis Carroll
Back to: Walter Day Conversations Lets go back in time to the Golden Era of the 1864 fable, Alice in Wonderland....Does the 1864 Alice in Wonderland Classic Fable or the Disney Movie have anything to do with the new Alice in Wonderland Video Game? Below are many screen shots of Electronic Arts Alice in Wonderland 2001 Violent Video Game and the Original Disney Movie and Original 1864 Controversial Lewis Carroll Fable.
Why is there so much controversy behind the Lewis Carrol classic, "Alice in Wonderland" and who is Alice Liddell?
The story of Controversial Lewis Carroll compromising Photographs and lifestyle.
Alice in Wonderland "The Movie, the Fable, and the Game Discussions"
Alice And Wonderland
Back to: Walter Day Conversations The Electronics Arts Alice And Wonderland Review Below:
 ------------------------------------------------------------------------------------ Release Date: Nov 8, 1995 Game Boy, "Alice in Wonderland" -- Non-violent -- Game Description: Be prepared to take a trip down the rabbit hole in ALICE IN WONDERLAND for the PC. Alice is just an ordinary girl who follows an unusual rabbit and finds herself in a world beyond imagination!.. ------------------------------------------------------------------------------------- Release Date: January 1, 2001 Electronic Arts, "Alice in Wonderland" -- Violence -- Electronic Arts, "Alice in Wonderland", Publisher Electronic Arts Developer Rogue Entertainment Gaming Platform PC Category Action/Adventure Requirements PII-400 64 MB RAM 4X CDROM 16 MB Video Electronics Arts, "Alice in Wonderland", Article is here. Titled "American McGee's Alice," by Rogue Entertainment, released in 2001, is a revolutionary 3rd person action/adventure based on Lewis Carroll's timeless characters and locations. The Alice team seems to have thought Wonderland would be more "edgy" if everyone was mean or crazy, and if Alice dressed up like a Wednesday Addams/Winona Ryder circa Beetlejuice clone. Ah, the subtlety'
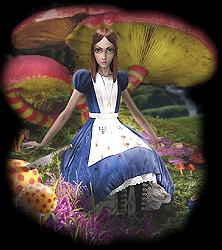


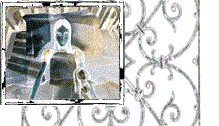
American McGee's Alice is a video game, a 3-D action adventure designed for the PC by Electronic Arts and released in 2001. This all-new Alice adventure adds a thrilling third chapter to the classic Lewis Carroll fantasies. It features many characters and places from those first stories, but things have definitely taken a turn for the worse in Wonderland.

Chapter 2 - Toys Alice can't liberate Wonderland all by herself - she needs an assortment of toys, otherwise known as weapons, to assist her. You'll find nine different toys during Alice's journey. Most of the toys possess primary and secondary attack functions. This section describes the toys you'll uncover during the trip through Wonderland and how best to implement them against the Queen of Hearts' forces. Vorpal Blade Vorpal Blade The first weapon Alice acquires is the vorpal blade, which is basically a sharp (and rather long) butcher knife. The vorpal blade features two attacks. Its primary mode is a melee attack that doesn't require any strength of will (the blue meter). The vorpal blade's secondary mode is a rough ranged attack. Pressing the secondary fire button will throw the knife at the target dot. After throwing the blade, Alice doesn't need to run over to pick it up - the vorpal blade will eventually reappear in her hand, but it takes several seconds to do so. This puts you at a distinct disadvantage if you're leaning on the blade as your main form of attack.
The melee attack requires quick footwork to be effective. You must be able to dodge quickly and employ hit-and-run tactics in order to strike with the vorpal blade but avoid the enemy's attacks. Approach the enemy, strike with the vorpal blade, and then sidestep left or right or pull Alice back and away from the enemy. Use the vorpal blade's ranged attack to strike the enemy from a distance and inflict some damage, then switch to another weapon and resume the attack - this is more effective than waiting for the blade to reappear in Alice's hands. But, if you're out of strength of will, be patient with the ranged blade, and you can take out an enemy without getting close. Cards Cards The deck of cards offers two separate ranged attacks. The primary attack launches single cards in a rapid-fire fashion. Target the enemy by facing it and activating the blue rings around it. Once the targeting ring appears, launch the cards. Be careful as you attack, though - if the enemy moves behind an obstacle or dodges quickly, the cards could either strike another object or miss entirely. The deck of cards' secondary attack launches a "burst attack" of cards; Alice tosses a handful of cards that track the enemy (though not all will likely strike the target).
The deck of cards offers a good combo attack with the jacks (described later in this section) or the ranged vorpal blade. After tossing the jacks or the blade, follow up with the cards' rapid-fire primary attack. Realize, though, that the cards aren't the best use of strength of will. They drain will quite rapidly and don't inflict the same amount of damage as the less expensive jacks. Keep that in mind as you attack. The deck of cards can be very effective at long range, much like the croquet mallet's secondary mode. Mallet Mallet Like the vorpal blade, the croquet mallet offers two forms of attack - melee and ranged. With the primary fire button, the croquet mallet operates as a billy club, providing you with a powerful close-range attack. The secondary mode offers a long-range attack - Alice tosses up a croquet ball and whacks it toward the target with the mallet. The croquet mallet offers a nice mix of attacks, but its ranged attack is quite slow and requires excellent accuracy to be consistently effective. If you start missing with croquet balls, you risk damage from the approaching foes.
Jackbomb The jackbomb is rather slow - it takes a while to reappear in Alice's hand, and it takes a few seconds to detonate. Therefore, don't employ the jackbomb all by itself. Use the jackbomb to weaken enemies. While the jackbomb is doing its job - either in primary or secondary mode - switch to an alternate weapon and finish off the enemies with another ranged attack. Lure enemies into the jackbomb's explosive path to make sure you get the most out of the weapon's damage potential. Ice Wand Ice Wand One of the most useful weapons in the game, the ice wand proves effective as both an offensive and defensive weapon. Its primary attack, a flamethrower-like stream of ice, can freeze enemies in their tracks. The stream of ice is especially useful against "hot" targets, such as the fire imps you encounter in the Land of Fire and Brimstone. The enemy disappears soon after being frozen solid by the ice wand; don't forget to pick up the enemy's meta essence, which appears just as if you had simply killed the enemy.
The stream of ice doesn't have a long range - you must get fairly close to your target to inflict freezing damage. Thus, just like with a melee weapon, you must be quick on your feet around the enemy. Strafe to the left and right while you keep the ice wand's crosshairs planted firmly on the enemy target. Back off if you're under attack and either prepare for another assault or switch to a long-range weapon. The ice wand's secondary function erects a wall of ice in front of Alice. This can be used as protection against ranged attacks, especially those from the card guards late in the game. Use the ice wall as protection as you switch weapons and launch long-range attacks. Jacks Jacks The jacks are perhaps the most economic weapons in the game - their damage to strength of will usage ratio is quite good. To use the jacks effectively, you must acquire an enemy target. The primary attack tosses the jacks in a haphazard fashion, though the jacks eventually connect with the enemy and bounce around the target, inflicting some damage with each hit. The secondary attack launches the jacks in a tight cluster, somewhat similar to the cards' blast attack. Though it takes some time, the jacks can inflict a lot of damage during their first toss at the enemy. For instance, the jacks can take down an automaton in the first toss if enough strikes connect with the target.
After tossing the jacks, you won't have access to the weapon until the jacks stop the attack and return to Alice's hands. Therefore, you should consider using combos. Toss the jacks at the enemy and let the small spiked weapons start inflicting their damage. While the jacks pummel the enemy, switch to another weapon and use it against the enemy. It will cost additional strength of will, but it allows you to inflict more damage and dispatch the enemy quickly. Use the jacks' secondary attack when tossing them at an enemy at close range; this inflicts a massive amount of damage in a short amount of time. -----------------------------
Demon Dice The demon dice are a unique weapon. You can collect from one to three dice, depending on how well you explore the levels. Tossing the dice doesn't always guarantee success - using the dice (or die, depending on how many you possess) may summon a demon. If a demon is summoned, its potency depends on how many dice you possess. The dice are extremely effective, when they work, against multiple enemies. The demon that appears, even the small demon that is summoned when you use just one die, has the ability to rip through enemies in fantastic fashion.
Demon Dice As the Cheshire Cat suggests when you first gain a die, be careful when you toss the die or dice that there are enough enemies to occupy the enemy. The demon will turn on you if you're the only available target! Using the dice in combination with other weapons is an excellent way to clear out enemy-infested regions of the game. Just be careful that the demon doesn't set its sights on Alice. Jabberwock's Eye Staff Jabberwock's Eye Staff While powerful, the Jabberwock's eye staff consumes strength of will quickly, which means you must connect on each blast if you hope to be effective. The primary attack must charge for a few seconds, and once it's charged (by holding down the attack button), the eye staff fires a straight laser beam. Just fix your crosshairs on the target and hold the beam steady to inflict damage. If there's a reliable source of meta essence (for instance, a lot of weak creatures) around, the eye staff can be a handy weapon. But, if it's tough to scoop up meta essence, the eye staff's extreme drain to Alice's will could be tough to overcome. Consider using the eye staff on the first attack then switch to something more economical, such as the jacks, once you regain some will.
The eye staff's secondary attack can clear an area much like the jackbomb's secondary attack. Once the secondary attack is initiated, Alice places the eye staff against the ground while it charges the attack. Let off the secondary attack button to launch the attack. Charging leaves Alice vulnerable to attack for several moments, so you may need to operate quickly depending on the threat surrounding you. Once the eye staff has charged, it launches an air to ground firestorm that can blast the area's enemy population. Blunderbuss Blunderbuss You'll find the most powerful weapon in the game in a couple of places, most notably the last level of the game. However, thorough exploration can uncover the blunderbuss earlier in the game on Caterpillar's Plot, Part 2. Push the loose brick next to the Humpty Dumpty look-alike on the left wall. This opens a secret door next to the gate that leads to the first oracle. Follow this tunnel to the blunderbuss.
Though the blunderbuss can inflict a large amount of damage very quickly, it does have its disadvantages. First, the blast can damage Alice as well, so you must be careful when employing a close-range attack. Second, the hard recoil can knock Alice back and into danger if you're on a ledge or if there are enemies behind you. Finally, the blunderbuss requires a full level of strength of will to fire - and it uses the entire amount! Thus, you get one good shot before you must save up strength of will for a second blast.
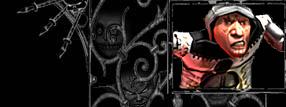
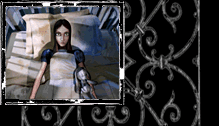

In this unique adaptation, the player takes on the role of a wiser, more resourceful Alice as she tries to free Wonderland from the domination of the deranged Queen of Hearts. The game is a phantasmagoric rendition of the classic Alice's Adventures in Wonderland, putting the player in the role of a resourceful Alice, reborn to handle the challenges of a sinister Wonderland. Her weapons are an array of nasty toys, and she faces vicious creatures, horrifying settings, devious puzzles and numerous strangely familiar locations.

The game was produced by Electronic Arts at their California headquarters and Rogue Studios in Dallas, Texas and directed by P.O.V. category veteran American McGee (yes, his first name really is 'American'). Cutting-edge 3-D technology, more than 15 challenging levels with 3-D surround sound, vivid characters and intricately crafted environments bring the creepy and organic world of American McGee's Alice to a PC near you right now.
Chapter 3 - Combat and Boss Strategies This section covers specific combat strategies to help survive Alice's greatest enemy dangers. Here you will also find specific tips for battling the game's boss creatures. Take note of which weapon you currently hold and if it requires a targeting ring around your enemy. For instance, using the ranged vorpal blade doesn't require a targeting reticle. The blade is simply tossed straight at Alice's crosshairs, and it will inflict damage on any enemy standing in the blade's path. The croquet mallet's secondary attack, though, is much more effective if you acquire a target first. If you launch the secondary attack without acquiring a target, the croquet ball normally just ricochets off the wall wildly and has little chance of hitting or causing damage to a target.
Don't stand still when using melee weapons! Don't simply run up to an enemy and expect to pound away with a melee weapon without being attacked by that enemy. Instead, circle-strafe around the target as you pound away with the melee weapon. This means using the sidestep keys - either left or right - to stay out of the enemy's line of attack. Also, don't hesitate to back off quickly to avoid enemy attacks. It's better to attack efficiently than to take a lot of damage in each battle. Be patient with ranged attacks. If you're relatively safe from enemy attacks and standing at a distance, line up ranged attacks carefully and make every shot count. If you're not in immediate danger, don't run around like mad dodging attacks that aren't there. Maintain your position and make each ranged attack count.
Don't forget attack combos. For instance, lay down the ice wand's wall defense then use the croquet mallet, jacks, deck of cards, or eye staff's primary fire mode to attack the enemies from behind the safety of the wall. Another combo: Toss the jacks and use a different weapon while the jacks inflict damage upon the enemy. The Duchess The first step in defeating the Duchess is staying away from her. Don't get close, or she can use her pepper shaker against Alice. Use the room layout to your advantage. Keep the circular table between you and the Duchess. If she runs left around the table to reach you, start running around the table to the right. Force her to remain at a distance, then drop jackbombs and lure her into the explosions.
Centipede Counter the centipede's little insect attack with the ice wand, which freezes the little insects in a matter of milliseconds. The little insects produce meta essence, which will keep your ice wand almost always completely charged with strength of will. As soon as the insects aren't a concern, you can turn your attention to the centipede itself. The centipede's weak spot can be found underneath its belly - locate the red spot when the centipede rises up on its hind legs. Attack this red spot with the ice wand (or any weapon); it takes several successful blasts to take down the centipede. Tweedledum and Tweedledee The Cheshire Cat offers the best clue before the fight - the bigger they are, the harder they fall. This is your cue to attack the large Tweedles first. The Tweedles will open their bellies and pull out smaller versions of themselves. If you attack the small versions, you will gain meta essence power-ups, but the larger Tweedles will simply re-create the smaller version. This can go on forever if you don't focus your attack on the larger Tweedles. Mad Hatter As with most of the game's late bosses, circle-strafing is essential. While keeping your crosshairs firmly planted on the Mad Hatter, sidestep to the left or right. This helps you avoid the Mad Hatter's attacks while making sure most of your own connect. Be prepared to dodge the Hatter's missile and projectile attacks. Stick around the perimeter of the arena to collect the meta essence power-ups. The Red King Stay back from the red king and employ circle-strafe techniques to avoid his attacks. Scour the arena for meta essence to keep your better weapons powered with Alice's will. Jabberwock You encounter the Jabberwock twice, and the second battle is definitely the tougher of the two. In the second encounter, soften the Jabberwock up with a blunderbuss shot when it misses a melee attack and falls to the ground. Collect meta essence and use the jacks until you can restore Alice's will supply. You can then use the blunderbuss again or use the eye staff's primary fire mode to attack the Jabberwock when it's high in the air. The Queen of Hearts Stay back from the Queen and take cover behind the pillars (where the meta essence appears). Use the eye staff from a distance and even consider getting in a blunderbuss shot if you have full strength of will. In the final boss encounter, pick up the blunderbuss to the right if you didn't pick up the weapon during the Caterpillar's Plot, Part 2 stage. Be wary of the small platforms and stick close to meta essence power-ups so you always have long-range weaponry available.
When Alice answers a distressed summons to return to Wonderland, she barely recognizes the befouled setting. From the fungal rot of the Mushroom Forest to the infernal chemistry of the Mad Hatter's Domain and beyond, Wonderland is festering to its core. Undaunted by the diseased ambiance, and mortal danger that surround her, Alice sets about undoing the chaos. Equipped with courage, a keen appetite for the bizarre, and a lethal array of transmogrified toys, she'll penetrate the strongholds of her enemies, confront the forces of evil, and put the wicked Queen of Hearts in her place. American McGee is best known for his work on shooters like Quake III, but he split off from id Software recently and his first effort is Alice, a twisted romp through his own version of Lewis Carroll's Wonderland. The trick is that Alice, now older, is the lone survivor of a house fire that kills her family. She's stuck in an asylum and must regain her own sanity by returning to the madcap Wonderland she visited as a child. She's a darker person now, and, perhaps consequently, Wonderland is correspondingly dark. Welcome to the American McGee's Alice game guide, which features all the strategies and walk-throughs you'll need to survive the dangers besieging Alice's former Wonderland. Inside this Alice game guide, you'll find: General Strategies: This section provides tips on jumping puzzles, ropes, and power-ups. Toys: Look here for the full list of Alice's toys, the weapons she uses against the Queen of Hearts' army. You'll find strategies for each weapon and learn how to maximize Alice's strength of will. Combat and Boss Strategies: Here you will find tips on targeting and long- and close-range combat, as well as specific tips for surviving Wonderland's difficult boss encounters. Level Walk-Throughs: This section features full walk-throughs for all of Alice's dazzling levels. Having trouble getting through Wonderland? Look here for puzzle solutions, tips on specific combat situations, and where to head next if you're currently stuck in a dead end. Cheat Codes: A list of Alice cheat codes, including invulnerability, "American McGee's Alice" level warp, and all weapons. ------------------------------------------------------------------------ Chapter 4 - Level Walk-Throughs This section features full walk-throughs for all of Alice's dazzling levels. This walk-through was completed on "medium" difficulty, so your mileage may vary if you selected an easier or harder difficulty level. The level walk-throughs include solutions to each puzzle and tips on specific combat situations. Dementia The game opens with Alice plummeting into Wonderland. When you gain control of Alice, move forward, then to the right. Speak with the slave worker here. He's not happy, and he tells Alice, "Slavery and happiness do not dwell in the same house." The Cheshire Cat appears and offers a cryptic clue about the next section. Turn and face the chasm, and notice the gust of wind blowing up from the chasm's center. In order to cross, run up the ramp and leap into the gust of wind. While floating, use the directional keys to guide Alice to the other side of the chasm.
Cross the chasm by jumping on the draft and floating over. Approach the next slave and listen to the brief anecdote regarding the Queen's tyranny. The Cheshire Cat appears again and explains the concept of meta essence. Follow the hall and grab the meta essence power-up in the alcove. Turn right and approach the green glow - this is the first toy you'll find in the game.
Listen to the Cheshire Cat describe the vorpal blade. A brief cutscene shows the white rabbit scurrying inside a small doorway - Alice needs to find a way inside! Speak with the next slave, who asks Alice if she's the savior. Alice asks how she might become small in order to follow the white rabbit. The slave suggests visiting the Fortress of Doors, which may contain the answer. Grab the meta essence beside the house and proceed forward - you'll spot a black card guard to the right. Defeat the guard with the vorpal blade, then continue into the Buzzed Saw Mill area. Stay on the left-hand path. Leap up to the ledge on the left and grab the essence on top. Walk over to the slave - Alice automatically asks about the Fortress and learns she needs to make her way into the mines. Spot the sign marked "Yur Mine" and leap to its ledge. Enter the passage to complete the level. Listen to the Cheshire Cat's hints, then use the ropes to cross to the area's exit. Pandemonium Walk forward to the meta essence. The Cheshire Cat interrupts with a hint about the hanging ropes, which you will spot to your right. Leap to the first rope and swing back and forth with the directional keys. Once you have obtained enough momentum, leap to the next rope. Complete the task once again and jump onto the catwalk to the right with the meta essence. Walk forward and greet the old man. Alice asks the old man about becoming small. The old man offers to help Alice if she retrieves something for him. Walk forward to the essence, then left under the "Danger" sign. Alice automatically hops into the mine cart and takes a rough ride into the next area.
Return the old man's key and he'll usher Alice to the Fortress of Doors. Turn around quickly and battle the black card guard with your vorpal blade. Walk forward and collect the meta essence. Pick up the deck of cards for your second toy. Enter the door on the right. There are three guards inside - two black card guards and one red card guard. Defeat them with the deck of cards and pick up the essence they leave behind. Snag the key at the end of the room - it's the item the old man wanted. Ascend the staircase and enter the portal on the top of the ledge.
To cross the ropes effectively, ascend the rope you're on before leaping to the next. When you reappear, you're immediately under attack! Two red card guards are shooting at you from a distance. Dodge their shots and quickly scamper out of the starting alcove to the left. There's a black card guard here; defeat him quickly with your vorpal blade. You're relatively safe from the red card guards in this left-hand alcove. Retaliate against their attack with the deck of cards, though you may need to move closer in order to target them effectively. Once all guards are defeated, use the rope to traverse up to the top meta essence. Spot the portal on the other side of the area. Use the ropes to move toward the portal. Enter the portal and greet the old man once again. You have the key he sought after. After a brief discussion, Alice hops in the old man's flying machine. During the trip to the Fortress of Doors, the old man requests Alice's help once again - he needs help in freeing his people.
Electronic Arts Games presentation ------------------------------------------------------------------- Fortress of Doors As you approach the Fortress of Doors, the old man points out the skool and indicates that there are items inside that can make Alice small. When you gain control of Alice, turn around from the start position and kill the red card guard patrolling the platforms. You can leap onto the platforms and grab the meta essence and strength of will power-ups. Return to the start position and move forward until you spot the entrance to the right. Walk inside and turn right toward the stone steps and ledges.
Hop in the old man's flying machine, and he'll take you to the Fortress of Doors and its skool. Ascend the stone steps using jumping and grabbing techniques. Leap onto the top catwalk and defeat the red card guard here. Go left around the catwalk until you encounter another red card guard - he's protecting a deck of cards toy, which you can pick up if you bypassed the first one. Return to the stone steps and jump your way down to the ground floor. Locate the doorway opposite the skool entrance - it lies on Alice's right if you hug the wall from the stone steps.
The path lies across from the skool entrance. Upon entering this next area, defeat the boojum with your deck of cards; use the pillars inside this tight room as cover. Pick up the boojum's meta essence to restore Alice's sanity. The middle floor in the room breaks apart, so be careful as you approach. Before you cross, search the left side of the room for a small alcove containing a large meta essence power-up. Cross the hole in the middle of the floor by leaping across the wooden planks on the right side. Ascend to the top area of the room and cross the tilting bridge. To do so, just leap onto the first part of the bridge and let it seesaw downward. Cross over the middle and to the other side. Before the end falls down completely, jump to the ledge on the far side containing the portal exit out of the area. Enter the portal to complete the level.
Avoid falling into the bottomless void by walking and jumping across the longer wooden planks on the right. Beyond the Wall Move forward, then right at the closed gate. Face the two black card guards; use your vorpal blade to defeat them, then collect their meta essence. Continue down the path and locate a strength of will power-up in the right alcove. Turn left toward the center of the area. Jump on the circular center and grab the rage power-up, which transforms Alice into a fighting machine. Black card guards will then drop down from the pillars and attack. Defeat them quickly with the power-up and vorpal blade combination. Walk around to the other side of the closed gate ahead and open the series of wooden doors.
The rage power-up temporarily increases Alice's attack power. You've entered an area with two platforms separated by a large chasm - though there's no gust of wind to help you now! The floor in front of you is constantly changing, and you must complete a series of jumping puzzles in order to reach the other side. Once the floor pieces connect in front of you, jump to the platforms and walk to the upper left. If you turn around, you'll spot the pieces appearing and disappearing in front of you. Once a piece appears in front of you, jump to the platform, then to the stationary platform ahead.
Wait for the floor pieces to appear before attempting any jumps. Wait until the floor pieces appear again next to you. Jump to them, and then to the platform with the meta essence across the way. Once the floor pieces connect ahead of you, jump and walk to the upper-left piece. The floor pieces again appear in front of you; leap to them, and then to the area that is all the way across the chasm from where you started. Quickly enter the portal ahead - there's a fire imp floating around, and it will attack if you're too slow!
Use this lever - and the levers on the floor below - to open the exit door on the other side of the chasm. Once you appear in the next area, immediately ready the deck of cards - boojum are on the attack! Defeat the two boojum and collect their essence. Approach and use the lever ahead. It reveals the correct tone sequence to open the doors ahead. Locate and descend the spiral staircase leading down to the left of your start position in the area. Approach the three levers. Use the levers in the following sequence: right lever, left lever, middle lever. Return up the stairs and start across the bridge. Even though it's not connected, a new floor piece will appear as you reach the edge of the current piece. As you move across, use the deck of cards against the black and red card guards on the other side.
Leap up the moving platforms carefully. Wait until your current platform is at its full height before jumping to an adjacent counterpart. Go through the hall of open doors and defeat the red card guard standing at the end. Enter the portal. You're now in an area with a series of moving platforms. The object is to traverse the platforms safely to the other side and reach the portal. Simply jump onto the first platform and, when it reaches its apex, leap to the next platform ahead. Wait until your current platform is higher or at the same level of the next platform ahead. Leap to the portal and enter the next area. Look out for the two boojum here. You'll find strength of will power-ups in the corners of the area - you'll want to grab them, as you'll need to make sure you're able to use your deck of cards. Defeat the boojum and collect their essence. Use the meta essence and strength of will power-ups around the area to fill your reserve. Spot the three doors. Approach the middle door and reveal the green portal; enter the portal to return to the Fortress of Doors. --------------------------------------------------------------------------------- Fortress of Doors, Part 2 Walk forward along the top of the castle wall - you've been here before. Take out your vorpal blade (use it instead of the deck of cards to conserve strength of will) and defeat the first red card guard. Proceed left along the top of the wall to trigger a brief cutscene featuring two boojum exiting the skool via an open window. Defeat both of these boojum with the deck of cards. Collect their essence to restore your sanity and will. You can also explore the ground floor around the skool (and the castle wall exterior) for more essence power-ups.
To enter the skool, jump through the open window on its right side. Walk to the far end of the castle wall (opposite your start position) to spot the open window in the skool. The Cheshire Cat appears and lets you know that "Entering skool requires a real leap of logic." Face the window and jump inside to complete the brief level. Skool Daze Enter the door ahead and be prepared for a fight - inside the room are three red card guards, one on the ground and another two up high. Kill them all with the deck of cards and collect their essence to restore your sanity and will. Ascend the staircase and walk to the left, then look for the new toy in the corner. To get to the ledge the toy is on, leap onto the top of the fireplace, which lies in between each ledge. From the top of the fireplace, jump onto the ledge with the toy. Once acquired, the Cheshire Cat appears to explain the toy - it's the billy club (or croquet mallet, depending on its use).
Jump onto the top of the fireplace to reach the billy club, Alice's third toy. Drop back down onto the ground floor of the room. Enter the door to the left of the entrance to the area (it's left of the fireplace). You'll see the old man inside some sort of theater. The old man tells you that the library contains a book that includes the potion recipe to make Alice small. As the conversation concludes, two red card guards enter. Defeat them with the billy club. As you exit, you see a cutscene of the old man moving something in the library. Walk upstairs and enter the door on the right. Defeat the two black card guards and enter the door at the end. You're now inside the library. At the intersection, go left and face the black card guard first. As you move farther down, more guards come. Enter the large room. Approach the large book in the alcove. When you touch it, the book flies to the top of the area, forming a platform. Locate the lift in the room and ride up to the second level. The Cheshire Cat then reminds you, "Take steps one at a time." On this second level, there's another large book to the left. Touch the book, and watch it fly to the top of the area, forming another platform. Kill the guards on this level and ascend the ramped bookcase to the right of the start position (you can explore the left side, though you'll only encounter a black card guard). Combat the red card guards up here, then touch the third large book to form another platform at the top of the library.
Touching all the large books in the library forms a bridge. Ride the lift in the corner of the room. Battle the red card guard at the top, then touch the fourth and final large book, forming a complete bridge over the library to the book with the potion recipe. Cross the book bridge carefully, then leap to the recipe book. The Cheshire Cat will interrupt you at this point, informing you that "A tap in the right spot might do the trick." Alice automatically pushes the book to the library floor. Pick up the meta essence, then descend the book bridge to the left. Walk down the ramped bookcase, and then take the rotating lift back down to the library floor. Walk to the recipe book to initiate a cutscene. Alice reads about the recipe and learns the ingredients for the Getting Small Elixir. Reading the recipe book concludes the level. ----------------------------------------------------------------------------- Skool's Out Defeat the boojum flying about the room and the black card guard who tramps down the stairs. Enter the first door on the left. Cross the wooden planks ahead, jumping to the small platform containing the first of three diabolical dice. Immediately turn around after seeing the Cheshire Cat's description of the dice - there are boojum attacking! If possible, jump across the planks back to the room's start area. You're very unstable on the current platform, and it's quite easy for the boojum attack to push Alice off into oblivion. Grab all the essence and return to the first room with the spiral staircase.
After picking up the first die, turn around immediately and defend yourself against the boojum. When you return, you'll find many enemies clamoring for your attention. If you wish, drop the die, which summons a creature to eliminate the enemies. Or, you can simply use your own weaponry to finish them off. Enter the door marked "1st Grayd" and defeat the red card guard inside. Walk through either the left- or right-hand door. Go up the stairs and grab the meta essence on the left and use the lever on the right. The lever extends this gymnasium's bleachers.
With the bleachers extended, climb up on the low ceiling girder on the right side. Ascend the bleachers and spot the low ceiling girder on the right (if you're facing away from the bleachers). Leap onto the girder and traverse the series of ceiling girders to the old man on the other side - don't pick up the rage power-up just yet! Talk with the old man, who mentions he has some mushrooms for the potion. At the end of the conversation, boojum enter the gym and attack. Pick up the rage power-up and defeat the imps with the croquet mallet. Defeating the imps cues a brief cutscene showing the old man inside the lab. Exit the gym and head back into the main room. Ascend the spiral staircase to the second floor. Go through the door and battle the red and black card guards inside. Proceed through the next door, which is marked "2nd Grayd," into the lab - the old man is under attack from two black card guards! Defeat them with your knife or club and speak with the man. The potion is nearly ready, but he needs some poppy blooms. Alice requests some Jumbo Grow for the poppies, and the old man points to a cabinet in the corner.
Take the vial of Jumbo Grow to the poppy seeds. Pick up the Jumbo Grow potion before leaving the lab. Exit the lab and enter the first door on the right - it's really thin, but Alice will fit! Defeat the red and black card guards here, then face the door marked "3rd Grayd." Enter this classroom and pick up the billy club in the corner if you haven't already procured that toy. Move through the next door into the hydroponics area. Approach the poppy seeds, and Alice automatically uses the Jumbo Grow potion. Pick up the poppy bloom and head back into the hall. Walk through one of the side doors and return to the lab. Back in the lab, the old man concocts the potion - Alice can now shrink and follow the white rabbit! The old man instructs Alice to go by way of the observatory and hands her a star to assist. Pick up the potion and the star and exit via the portal. You're returned to Skool Daze.
Peer into the observatory's telescope to open the portal that leads back to Skool Daze. Skool Daze, Part 2 Defeat the black card guards and ascend the staircase. There's a large meta essence on the platform where the first billy club rested. Pick it up if you need restoration. At the top of the stairs, go right and into the library (you've been here before). Defeat the boojum and go up the rotating lift. Ascend the left-hand ramped bookcase and take out the red card guards. Enter the door marked "Observatory" and watch the cutscene of Alice riding up the lift. Defeat the guards in the room with your deck of cards. Pick up the strength of will power-ups on the side of the room if you need them. Climb up the staircase (making sure to leap over the hole in the stairs) and approach the eyepiece of the telescope. This triggers a cutscene of Alice drinking the potion and leaping into an exposed portal. This concludes the Fortress of Doors and sends Alice into the Vale of Tears area and the next level, Pool of Tears. ----------------------------------------------------------------------------------- Pool of Tears Walk forward to the "Falling Rock" warning sign. Turn to the right and spot the ledge that leads up through the waterfalls. Jump onto the ledge and start ascending the wall. You will have to leap over gaps, as well as pull yourself up to higher ledges. Continue ascending until a cutscene interrupts your path - an ant at the top has pushed a boulder down! Don't move at all, and this first boulder will miss you. It will roll down and fall between two ledges. If you advance, you must turn around and jump back to avoid getting smashed. Once the first boulder passes, continue up the ledges.
Avoid the boulders by retreating to a previous ledge. When you near a rough waterfall crossing, a cutscene reveals that a second boulder has been released by one of the ants at the top. This boulder will hit you if you don't move. Immediately turn around and leap back to the previous ledge. The boulder will now miss you and fall down between a gap in the ledges. Resume your course up the ledges and leap over the rough waterfall, sticking to the left as you leap over. As you near the top, ladybugs that drop explosive acorns begin to attack. You can fight them off, though it's better to hurry up the ledges and save your strength of will for the ants at the top. As you near the top, another boulder falls - and you have no warning. When you hear it (or see it) turn around and leap back down to the previous ledge, and the boulder will miss and fall through a gap. Start back up to the top. When you reach the top, you will find three powerful ants. Try to avoid close combat, as each ant carries a powerful gun that can blast you off the mountain. Use the cards (faster rate of fire) or the croquet mallet (more damage) as you strafe wildly to avoid the ants' attacks. Defeat one ant and quickly grab its meta essence to restore your sanity and will. Defeat the other ants before moving on.
If you've explored all paths, look to the river and hop on a leaf or over some lily pads. Follow the river path at the top of the mountain and approach the Mock Turtle. ck Turtle says that "the caterpillar could help you find the rabbit." He'll help you locate the caterpillar if you retrieve his shell from the Duchess. A leaf falls from the sky, and the Mock Turtle uses it as a boat to traverse the river. Another leaf falls shortly thereafter - hop on the leaf and follow the Mock Turtle. As you move down the river, you will spot a meta essence on top of a root. If you need restoration, leap off the leaf onto the root and grab the power-up. Beware of the flying creatures above; they're still dropping their bombs. Attempt to avoid their attacks by shifting around on the leaf - avoid standing still on the roots. Eventually the leaf falls down a short waterfall, and Alice can't stay on the leaf as it falls. Immediately jump to the left and avoid sticking around in the water too long (dangerous fish!). Defeat the ants here by taking cover behind the rocks and using the croquet mallet or cards. Once you have dispatched the enemies, leap across the lily pads onto the next leaf - time to take another ride! Grab the meta essence on the root. There's also a right turn shortly thereafter; as you turn, you can leap onto the land and pick up a large meta essence. Walk to the other side and hop on the leaf as it passes by to continue down the river. Continue down the river. Get back on the leaf if you fall off or are pushed off by a waterfall. Avoid the roots by shifting to the left or right on the leaf. You will eventually encounter a series of low roots. Leap over them, grabbing the meta essence on top, and drop down on the other side and back onto the leaf. When you see the Mock Turtle standing on land in front of you, get ready to jump, because there's a large waterfall ahead. You can either jump to the land on the left or to the vine hanging above the fall. Follow the Mock Turtle to another leaf. You'll ride down the river until another large waterfall takes Alice to the next level. ----------------------------------------------------------------------------------- Hollow Hideaway Follow the river on the right side. Prepare the billy club or cards, as you're about to face two ants up ahead. If you need additional meta essence, retreat back to the start position and pick up the two power-ups. Continue onward and battle an additional two ants. Spot the lily pads leading into the river. Leap over the lilies and onto the root. Look out for the two flying insect bombers above. Defeat them if you wish, though it's likely you'll want to conserve strength of will for the impending battles ahead. Traverse the root to another floating leaf. Dodge the roots to the left and right and leap to the beach to the left - spot the large meta essence near the mushroom. Jump back onto the leaf, but be careful - if you fall into the water, quickly swim to shore or jump onto a root. There's a giant fish in the water, and he won't hesitate to use Alice as food! Once you're on land, don't be overly aggressive. Don't charge up the hill and trigger the mushroom and rose. Stay down here and defeat the ants with your deck of cards or croquet mallet. Next, trigger the mushroom and defeat it and the rose behind it. Grab all the meta essence power-ups, then follow the path left of the river, which contains a couple more ants.
Defeat the ants guarding the house exterior. At the end of the path, leap onto the leaf to the right. Remain on the leaf until you spot the floating lilies on the right. Leap onto the lilies, then to the right side of the river - spot the two ants guarding the front entrance to some sort of house. Defeat the ants with the deck of cards or billy club. Approach the house to trigger a cutscene. A frog emerges, calling himself Bill McGill. After a brief conversation ("everything is down-side up"), follow him through the door, though Alice doesn't just walk in - she's sucked into the next level! Just Desserts Follow the dark hall to a circular room. Grab the jackbomb hovering above the table to trigger the entrance of the Duchess. The Duchess chases you around the room using a powerful pepper shaker! The easiest way to defeat her is to employ your new weapon, the explosive jackbomb.
Stay away from the Dutchess Run behind the circular table. Keeping this table between you and the Duchess is the best way to stay away from her. Also, it's the best way to lure her into the jackbomb explosions. When you're on one side of the table and she's on another, toss the jackbomb on your side of the table. Back off, and the Duchess will attempt to approach you, but she'll run into the jackbomb instead. Repeat this process several times until she's defeated. Stay away from the Duchess and drop the jackbomb in her path. It's very difficult to beat her by simply running around the room and tossing down the jackbomb in hopes that the Duchess will run into the explosion. Use the table as both protection and bait. If you need additional sanity or will, grab the meta essence power-ups found in the room - they're located on the shelves. Defeating the Duchess triggers the level's end cutscene. The Mock Turtle approaches. To pay you back for the favor, he opens a trap door in the circular table and instructs Alice to follow his bubbles. ----------------------------------------------------------------------------------- Wholly Morel Ground It's time to follow the Mock Turtle through a dangerous underwater area. Attempt to keep the Mock Turtle in your view by swimming close to his bubbles. Avoid the top and bottom of the caverns; Alice will absorb severe damage if you rub up against a sharp stalactite. Follow him forward into the tunnel and then around a turn to the right. Head down and avoid the dropping rocks. Stick close, as it's hard to follow his path once you've lost sight of him and his bubbles.
Stick close to the Mock Turtle by swimming inside his trail of bubbles. You can pick up some meta essence power-ups, though they are guarded closely inside the jaws of clams. It might not even be worth the risk. Unless you're desperate to replenish your sanity, ignore the power-ups and steer clear of the clams, which can inflict plenty of damage, just like the sharp rocks on the cavern's roof and floor. Another thing to avoid during the swim are the geysers shooting out of the sea floor. Swimming over one of these will propel Alice into the cavern roof - not a good thing when most of the cavern roof is covered with sharp rocks! Swim to the left or right of the geysers and avoid moving over top of them. As you follow the Mock Turtle through the area, a fish attacks Alice from behind. You can simply swim on course and avoid the fish. If you wish to terminate the creature, though, use the deck of cards. The cards' rapid-fire attack works well against the small creature, and it means you won't have to be distracted from the Mock Turtle's path for long. Turn around, fire the deck of cards quickly, and resume following the Mock Turtle's bubbles. Follow the Mock Turtle into an area filled with pillars, then head down through the opening near the sea floor. Be ready to pull back quickly, as a large fish attacks from below. Steer Alice carefully around the sharp corners and tight areas that the Mock Turtle swims through - he doesn't seem to take the best path! Follow him carefully, but not necessarily closely. If you see him enter a tight area, look for a way to bypass that area and avoid the dangers inside (such as a sharp rock or clam). Defeat any additional fish that attack Alice and continue to follow the Mock Turtle through openings in the cave walls. Avoid falling rocks, geysers, and clams as you complete the underwater area and emerge into the next area, Wonderland Woods, and the next level, Dry Landing. Dry Landing There are ladybugs above you as you start the level. Be wary of their acorn bomb attacks! Move forward, and then follow the path to the left. There's an army ant here - defeat it with the deck of cards or croquet mallet. Return back to the meta essence near the start if necessary. You can use the ledges to reach the meta essence power-ups up high. Walk forward to the lily pad pond. There's another army ant up high on a ledge across the pond; take it out with swift action from Alice's cards. You'll face another enemy in the pond if you dawdle - there's a jumping fish inside that will jump and attack. Cross the pond on the lily pads and use the rope overhead to reach the high ledge. Walk left around the top of the waterfall. Defeat the rose with the deck of cards and grab the meta essence power-ups nearby. Walk to the glowing mushroom. Leap onto the glowing mushroom and use it to bounce high to the rope above. Ascend the rope and leap toward the rabbit. Approach the rabbit and listen to the conversation regarding the caterpillar.
Ascend the rope and speak with the white rabbit - time to make a new acquaintance! Move past the rabbit's position and drop down to the ledges sticking out from the tree. Defeat the ant ahead before leaping to the rope. Jump to the rope, then onto the path, and then continue forward. Take out the cluster of roses with the jackbomb. Follow the path to the left and combat the ant. Use the root to reach the ledges and the meta essence. At the next overlook, spot the rabbit running ahead. Drop down onto the ledge with the power-ups. Take out the rose and the ant nearby. Use the glowing mushrooms to bounce high, which will allow you to traverse the area. You want to reach the area where the ant was - use the mushroom and the ropes. Go through the tunnel into the large shaft with an exit leading upward. Climb the rope and use the glowing mushrooms to reach the high ledge with the meta essence. Use the mushroom again to grab hold of the highest ledge - it contains a rage power-up. Grab the rage and leap to the exit opening (drop down to the lower ledge first). Take out the ants and the rose quickly while the rage is still active. Hug the right-hand wall and turn left at the intersection, spotting an army ant waiting for you ahead. Defeat it, then approach the bridge.
A careful examination of the ledges at the top of the shaft reveals a rage power-up. The bridge collapses in front of you. Instead, use the glowing mushroom on the right of the bridge. Take out the rose and attack mushrooms with a couple of jackbombs. Follow the path to the right into the next tree area. Leap to the rope, then to the ledge on the right. Grab the meta essence power-ups. Leap to the next room and climb to the top. Defeat the ant quickly and move forward to the river. There are many ladybug bombers in the area. Your destination is the path that leads to the right, and roses are guarding it. Be careful traversing the river. The steps are quite small, and it's nearly instant death if you fall into the raging rapids. Cross the stones and avoid the jumping fish in the water. Take out the remaining roses and jump onto the path. Maneuver through the archway to complete the level. ----------------------------------------------------------------------------------- Herbaceous Border ----------------------------------------------------------------------------------- The level begins with the rabbit's declaration, "The caterpillar lies just beyond the clearing!" The rabbit runs ahead and is greeted rudely by the heel of a large man's foot! The foot smashes the rabbit into the ground as Alice looks on in horror. When you gain control of Alice, turn to the left and grab the meta essence power-ups on the ledges (or save them until you need them). You're in a circular area. Exploration of the area uncovers some enemies - roses, ants, ant lions - and two holes leading into the underground. You can drop into the large hole or the small hole - both eventually lead to the same area.
Peer over the side ledges to ambush army ants and ant lions. Drop down into the small hole and float over the wind currents inside the large cavern. Go right at the intersection and walk to the middle of the bridge in the next large cavern. When you reach the middle, the bridge segments around you crumble to the ground. You're under attack from ants now. Don't retaliate. Rotate Alice until you locate the glowing mushroom. Jump to the glowing mushroom, then bounce to the left ledge. Follow the path into the next cavern. The Cheshire Cat appears at the top of the area and proclaims, "Go with the flow, whatever floats will do." Drop down the first ledge and walk over to the meta essence. Grab the power-ups if you need them, then hop on the wind current and ascend the two ropes to the ledge leading to the deck of cards toy. Grab the cards at the top and exit the hole. Defeat the rose to the left with the cards. Turn right and drop down to the meta essence. Follow the path around the tree. Use the jackbomb to take out the roses and the ant lions that charge you. Make sure you grab the meta essence, if necessary, then drop into the hole you find at the end of the path to end the level.
If you turn around and face the rolling stone - like Alice in this screenshot - you will surely die. Just keep moving forward and ignore the danger behind you. Rolling Stones The level's opening cutscene reveals a frightening turn of events - a gigantic boulder has been dropped behind you and, if you don't hurry, it's going to crush you! When you gain control, immediately begin running down the path, following it as it winds to the right. You eventually reach an open cavern - you're still not safe, though! Leap to the glowing mushroom on the right, which bounces you onto the center platform with the meta essence. Jump from there to the glowing mushroom on the left, which bounces you to the far tunnel.
Let the rolling stone crash through the ice and form a makeshift path to the other side. Keep moving steadily, as the boulder is still behind you. Cross the bone formation and follow the tunnel until you approach a patch of fragile ice. Hug the right-hand wall to avoid the boulder behind you. You can't cross the ice, because it will crumble beneath your feet and you will plummet to your death. Instead, let the boulder pass you and fall through the ice. It crumbles most of the ice, but it leaves some ice for you to traverse. The path is extremely slippery, so you must move with care and caution. Just use the back directional key to slow Alice down as she slides. Jump to each segment of ice and grab the meta essence power-ups if necessary. Use the right-hand ice segments to reach the other side. Continue Alice's advance up the tunnel to complete the level. ----------------------------------------------------------------------------------- Icy Reception When you gain control of Alice, begin moving forward and notice the ground here is still slippery. Once again, be very careful when moving in any direction. The ground is slippery, and it's easy to lose control, especially on narrow walkways. If you're moving out of control in a direction, press the opposite directional key to slow down. Continue forward until you reach the overlook. Jump onto the ledges on the right. Leap to the platform with the ice wand and grab the new toy.
Don't leave Icy Reception without grabbing the ice wand. Turn around after picking up the ice wand and spot the new path away from the narrow bridge. Leap to this path, and you'll trigger a cutscene featuring another boulder - time to be chased once again! Start running! Follow the winding path until you emerge from the ice caverns. Grab the jackbomb on the left. There are ladybug acorn bombers above; listen for their attacks and dodge them accordingly. Use the wind currents
Go right and use the wind currents to cross the chasm. Once you reach the far ledge, enter the area cluttered with mushrooms. Approach the caterpillar to engage in conversation and learn new story elements. It appears Wonderland is "severely damaged," and to help, Alice must destroy the Queen of Hearts. The caterpillar concludes with the instructions, "Head to forest and face the centipede." Leap into the portal to conclude the level once the conversation is over. As you did in Alice's first level, cross the chasm by jumping into the wind currents and floating over. Fungiferous Flora You begin facing four attack mushrooms. Don't approach them. Kill the two mushrooms on the far right and you can pass by the other two without detection. To kill them, approach them and then toss the jackbomb to finish them off. After the mushrooms, you will face ants and ant lions. Use your new ice wand against them; the freezing properties of the ice wand - which operates like a flamethrower - are effective against the army bugs. Switch to the deck of cards against the rose. Grab the meta essence on the right, then approach the additional mushrooms ahead.
Search all alcoves to grab weapons and power-ups. Take out the mushrooms with the jackbomb, then use the ice wand against the ants. Spot the pool at the far left at the end of the area - you'll see some meta essence power-ups inside. Dive into the water and swim underneath the edge of the wall to the other side. Follow the path to the mushroom. Use the ledges on the right to reach the die in the alcove. Hang a right at the end of the path. Defeat the mushrooms in front of the cave. Leap into the cave, and you'll hear someone attempting to shout an army into action. Ants will then approach aggressively; use your ice wand to fend them off. The level ends after you defeat the group of ants - it's time to face the centipede! Centipede's Sanctum The battle with the centipede takes place in a circular arena. There are ledges on the edge of the arena that hold meta essence power-ups. The centipede uses melee attacks but also unleashes some smaller insects that can latch on to Alice, slowing her down and inflicting moderate amounts of damage.
The centipede's a tough customer. Wait until it raises its belly and fire the ice wand into its red vulnerable spot. To defeat the small insects, use the ice wand. The insects freeze quickly, and you can scoop up the meta essence easily. Defeating the centipede takes a bit more ingenuity. When the centipede attacks at close range, it lifts its belly up. Close observation of its belly reveals a red spot - this is the centipede's vulnerable area. When the centipede lifts its belly, attack the red spot with the ice wand. It will take three or four good strikes against the centipede in order to defeat the beast.
Once the centipede falls, ascend the center pillar and leap up to the toadstool. After a brief conversation with the Cheshire Cat, Alice eats a piece of the toadstool and reverts back to her full size. Eating the toadstool also concludes the level. ----------------------------------------------------------------------------------- Caterpillar's Plot The level opens with a few words from the Cheshire Cat, "Only one path will bring you to the end game." Defeat the fire imps scattered around the map; use the ice wand to defeat them quickly and relatively easily. Explore this first area for several meta essence and will power-ups. After defeating the fire imps, approach the toy in the center of the area. Ascend the pillar and jump to the top to pick up the toy - it's a segment of the Jabberwock's eye staff. The Cheshire Cat explains the weapon - you need the full staff for it to be effective. Grabbing the eye staff also opens a nearby gate. Ascend the pillar in the level's center to pick up the first segment of the Jabberwock's eye staff. Go through this open gate. You'll come under attack immediately from air units and fire imps. There are also some red card guards on a balcony behind you. Scurry along the left path to avoid the attacks from the red card guards. Stick to the left path and approach the high cavern. The oracle tells Alice that you can only face the Queen of Hearts after you "crush her sentinel, the Jabberwock." In order to do so, you must locate all the pieces of the eye staff. Speaking with the oracle triggers another gate opening, revealing a portal entrance. The end of the path (beyond the oracle) includes some meta essence. Return to the level's start position; along the way, you will face more fire imps. Stick with the ice wand; it's your best offense against the creatures here. Back at the level's start position, hug the left wall and spot the sign indicating the path to Pale Realm. Move into the Pale Realm path and walk to the right around the checkerboard steps. Spot a crawl space underneath the checkerboard steps. Walk inside, and Alice picks up a mirror - this power-up temporarily turns Alice invisible. Now that you're invisible, it's quite easy to sneak around the chess pieces and card guards to the portal that opened after speaking with the oracle. Continue up the checkerboard steps and avoid contact with the chess pieces. Hurry, because as soon as you're visible, the pieces and card guards will attack. Enter the portal to complete the level and enter Looking Glass Land.
Sneak past the chess piece guards while invisible. Pale Realm Approach the white bishop guard on the left. He lets you by, but he also turns Alice into a bishop! You must now move like a bishop chess piece through the next area, which is cluttered with holes and dangerous spikes. Bishops can only move diagonally. Look ahead of your position and make sure you aren't moving into a hole or a spike. Follow the checkerboard carefully, and if you are moving toward danger, simply adjust the camera and retreat a space backward. When you exit the area, Alice returns to her standard form. Some red pawns attack from the right. Defeat them with Alice's ice wand.
When Alice turns into a bishop, she must move like a bishop - diagonally! Climb up on the center pillar and procure the billy club (though you should have it by now). Take on the red knights in the area (once again, use the ice wand) and enter the double doors found to the right of the start position. You can also explore the other single doors in the area - most lead to a small room containing a meta essence. Defeat the chess pieces beyond the double doors and ride the lift up to the second floor. You'll face two doors. The left door leads to a meta essence. Go through the right door and avoid the spike trap blocking the path. In the next clearing, bishops attack. Grab the sanity power-up on the left. Approach the double doors on the far right. Defeat the knight and pick up the deck of cards to the right of the staircase. Ascend the stairs and eliminate the pawns. Enter the right-hand door at the end of the hall. Use the lever on the balcony beyond the door. The lever opens a door behind the white rook. Drop down and locate this open door. Watch out for the red knight on the right before the door; defeat him, then move through the door.
The lever on the balcony opens a door near the white rook. Once through the door, a bishop attacks from the left. Defeat him and the white rook that appears. Climb up the to left ledge and pick up the large meta essence power-up. Proceed right. If you descend the stairs on the right, you'll locate a knight and a meta essence power-up. If you descend the stairs on the left, you'll locate a knight, some pawns, and a few strength of will power-ups. Cross the bridge (will power-ups to the right) and spot the pawns to the right guarding the meta essence. Go left around the corner after the bridge and greet the white knight. Alice transforms into a knight and must complete the next area using knight moves only! The knight moves in an L-shape. For instance, two steps forward, then one step left or right. Or, two steps left or right then one step forward or back. Traverse the area quickly and avoid the holes in the floor and the spikes. Alice reverts to standard form on the other side. Quickly ready a weapon, then face off against the bishop and pawns that attack. Go left to get a meta essence, then head right to the door. Defeat the pawns on the right and grab the meta essence underneath the stairs.
A carefully placed jackbomb can destroy the crumbling wall behind the barrels. Ascend the staircase and pick up the jackbomb at the top. Spot the crack in the wall beyond the barrels. Place a jackbomb next to the crack to open a hole in the wall. You can exit through this hole and jump across a series of ledges to reach a sanity power-up. Back in the room with the jackbomb, exit through the door and cross the bridge. Kill the knight inside the tower. Use the lever in the next tower to start the waterwheel in motion. If you leap down and swim behind the waterwheel, you'll find a large meta essence power-up. Swim to the far side of the area opposite the waterwheel area. Pull yourself up onto the ledge on the left side. Defeat the pawns and snag the meta essence here. Locate the double doors on the left. Open them and descend the staircase to complete the level. ----------------------------------------------------------------------------------- Castling Exit through the double doors. Spot the meta essence power-ups near the downed white chess pieces. Don't grab the power-ups just yet - you'll need them shortly! Walk through the archway on the right to trigger a cutscene. Red knights and rooks emerge with a prisoner - the white queen! Battle the knights and pawns behind you when you regain control. Use the meta essence near the downed white pieces to restore your sanity and will. Climb the left or right stairs after the archway and enter the towers to pick up some meta essence power-ups. Go through the series of double doors and approach a battle between white and red chess pieces. Help out by attacking the red pieces with your ice wand. Go up the left ramp to the first door on the left. Ascend the ramp on the left and battle the bishop. Exit through the doors and face off against the red rook. Enter the next door to spot another battle between white and red pieces.
Follow the white rook to the level's exit portal. Drop down off the balcony and attack the red pieces with Alice's ice wand. Enter the large double doors at the top of the staircase. Approach the white king chess piece at the end of the room. The white king pleads, "Help us, please... Our own queen is in danger... Free the white queen, Alice." The white king hands Alice a white pawn and instructs her to follow the white rooks to exit the area. Follow the white rooks back through the area's start position and up the ramp and staircases to a portal. Leap into the portal to clear the level.
Finding the path that leads to the level's destination requires jumping into the water and exploring this alcove. Checkmate in Red Go down the staircase and face off against the red pawns. As you move forward, you'll encounter a rook to the right and a knight (along with some will power-ups) to the left. Cross the bridge, and you'll find a bishop and some additional meta essence power-ups. After exploring the area, jump off the bridge into the water. Swim down and locate the alcove with the meta essence power-ups. Swim inside and pull yourself up on the ledge.
You'll find another die on the table. Jump up to the rope and ascend to the top of the tower. Battle the bishop and pawn here. Cross the bridge to the adjacent tower. Follow the path to the left where you will spot a couple of pawns emerging from a door. Defeat the pawns, then enter the room. Grab the die from the table and proceed through the far door. After opening a couple of doors, a cutscene interrupts gameplay and shows the white queen with her head in a guillotine. There's nothing you can do to stop the carnage - the blade drops and severs the white queen's head. Follow the winding path outside, defeating the red bishop and knights along the way. Further down, you'll face off against a couple of rooks at the base of some stairs. Enter the double doors at the end on the left. Walk to the end and leap down the hole.
Circle-strafe around the red king to avoid his attacks. After emerging into a large open area, cross the drawbridge; it rises behind you locking you into the area. The red king appears - it's time to do battle! Circle around the red king and shoot him with the ice wand or deck of cards. As you battle, meta essence power-ups appear around the board. Pick them up to restore your sanity and will. If you run out of strength of will and want to attack before picking up a power-up, use the billy club in primary fire mode to melee attack the king. Keep moving to avoid his laser and close-range attacks. When the red king falls, the staircase at the end of the area lowers. Alice automatically walks to the top and takes out the white pawn. Alice places the white pawn on the ground, which, by rules of chess, changes into the white queen! An army of red pieces emerges, and the white queen moves to engage them. But, before Alice can watch the battle, a giant-sized Mad Hatter appears overhead and knocks Alice unconscious. The level concludes with Alice waking up in an unusual new area. ------------------------------------------------------------------------------------ Mirror Image Go right from the start position (though either side eventually leads to the same point). During your exploration of this mirror maze, you'll fight some automatons. These robot monstrosities can take a lot of punishment. Use the ice wand, and if you run out of strength of will, follow up with some strikes with the billy club. Explore the first dead end to pick up a large meta essence. Follow the tunnel to a three-way intersection. Explore the left dead end to pick up a strength of will power-up. The forward path ends in some meta essence. Head right and face off against another automaton. Pass by the open wall with the gears and clock - though remember this area, as you will return here shortly. You can complete the sequence now, but you may miss out on procuring the jacks, a powerful new weapon!
Destroy the clock face with the deck of cards to open a new path. At the next intersection, go right and approach the wall in front of you - it busts open, revealing a couple of automatons and a new toy, jacks! Quickly grab the jacks before wasting any strength of will on the automatons. The jacks are extremely powerful, and they're very effective against the automatons. Defeat the automatons with the jacks. Continue down the tunnel. Defeat the automaton that attacks you from behind and grab the large meta essence near it. At the next intersection, head right for sanity power-ups, then left to face another automaton. At the next intersection, right leads to a meta essence, and left leads to more automatons. Follow the path around to the left until you reach an area with left and right paths in front of you. The right path leads to a strength of will power-up. Go left, and it returns you to the level's start location.
Use the Roman numeral platforms to reach the rage power-up. Return to the area with the clock and gears. Jump onto the pipe and shoot the clock face with the deck of cards. This opens a tunnel in the next hall. Return to the mirror maze and go beyond the clock area to the next tunnel. Leap into the circular tunnel, then walk to the middle, and the circular tunnel will rotate, revealing two new paths. As before, these paths will eventually lead to the same area. However, you need to explore both and enter each asylum room and shoot all the clock faces. Shooting all the clock faces will overload the steam pipes and destroy the door that blocks the entrance the next area. As you explore these asylum rooms, be wary of the spider creatures. Use your newly acquired jacks to defeat them. Retreat as the spiders advance and attack; fire the jacks at the spiders to inflict damage and eventually kill the beasts. Once you have destroyed all the clock faces, go through the circular tunnel to the area where the turn toward the door appears on Alice's left. Go through the door, and you'll enter an area with moving platforms. You must balance the platforms so Alice doesn't fall off. For instance, if the platform rotates forward and backward, you can adjust the platform by standing toward its front or back. Fight off the boojum attack using your jacks. When you reach the intersection, go along the left-side platforms until you reach the second floor of the area. The platform up here rests between a small gazebo-like area (with insane children inside) on the right and an empty bedroom on the left. Rotate the platform by standing on its right. Run and leap into the bedroom area. From here, traverse the Roman numeral platforms to the top of the gazebo. Grab the rage power-up here.
Crossing the spinning rings is tough. Defeat the automaton first so you don't have to deal with his projectile attacks. Drop down and go through the door on the right. The next door is open if you shot all the clock faces and saw the cutscene of the door exploding. Boojum attack as you enter the next area. Defeat them with your deck of cards. Avoid the steam jets that fire from the wall. If you fall into the deadly water below, use the ropes to ascend back up to the walkway. Locate the path leading to the moving rings. Approach the rings and attack the automaton on the other side - only use jacks so you conserve strength of will. Hop through the rings one at a time and keep taking shots at the automaton to defeat him. Attempt to avoid the bombs he tosses, or you could be pushed into the water below. Cross to the opposite platform and walk to the door. Open the door and enter the chamber of Tweedledum and Tweedledee.
Eliminate the larger Tweedles first to stop them from reproducing! The Cheshire Cat offers a brief hint as you prepare to engage 'Dum and 'Dee: "The bigger they are, the harder they fall." Take his advice, and attack the bigger one first. 'Dum and 'Dee open their bodies and release smaller versions of themselves. These smaller enemies will keep coming, even if you defeat them, because the larger 'Dum and 'Dee will just make them all over again. However, if you defeat the lead beasts, they can no longer produce the small versions. You can defeat the small versions if you need meta essence. You'll find other power-ups up on the staircase. The Mad Hatter appears after you have defeated 'Dum and 'Dee. He invites Alice in for some tea. The level concludes here, and Alice moves to Behind the Looking Glass and into the next level. ------------------------------------------------------------------------------------- Crazed Clockwork Walk forward toward the clock and kill the boojum. Approach the door on the right. Grab the strength of will power-ups just before the door. Once inside, kill the spider that drops; use your jacks to maximize damage but conserve strength of will. At the intersection, go right to the lever and use it. Return back to the left path and use the lever there as well. The gear in the center of the area lowers, revealing a new path. Leap onto the gear, then toward the path containing the meta essence power-up. Open the door to the left. Spot the grasshopper tea power-up beneath the steps. Grab it to increase Alice's speed and jumping ability temporarily. Use the platform on the water to leap back onto the steps. Cross the steps to the next door. You're at the foot of a series of clock face steps. Leap over the steps to the lever and the sanity power-ups in front of you. Use the lever.
The grasshopper tea temporarily increases Alice's speed and jumping ability. Turn around and hop over the steps. Then go left around to the now-opened door. You reach an intersection leading forward and to the right. Go forward and locate the right-hand room just before the door at the end of the hall. Grab the sanity power-up inside this room, then drop down through the hole. Kill the spiders in the room. Walk to the double doors. Enter and watch the cutscene - Alice watches the machinery creating automatons. Nearby, mouse and rabbit prisoners (looking quite mechanical) plead for Alice's help. Use the lever in the room, which opens a gate in the previous area. A brief cutscene shows the Mad Hatter inserting a key into a keyhole. Return to the previous room, go up the steps, and head through the open gate. Kill the automaton and grab the strength of will power-ups. Use this lever to trigger actions from the Mad Hatter. Follow the hallway to the right and look in the first room on the left to spot the room with the keyhole. The Cheshire Cat offers some words of wisdom before Alice goes through the open door. Once through the door, cross the steps and spot the rage and meta essence power-ups on the high ledge to the left. To reach them, leap on the gear to the left of the steps. Ride the gear up, then leap to the ledge. Watch out for the spiders that attack. Collect the meta essence and grab the rage power-up.
Take the time to grab the rage power-up for an easier fight against the spiders. Drop down on the gear, then onto the steps. Go left and, with the help of the rage power-up, destroy the collection of spiders in the corner. Leap to the double doors and approach the caged gryphon. He tells Alice that the "Hatter checks on his creatures at six o'clock." Look to the left and right of the ledge in front of the cage - here you will find a large meta essence to left and a die to the right.
Speak with the gryphon, a key player in Alice's climatic conclusion. Exit the area and go right to the double doors. Cross the bridge, defeat the spider, and open the door at the end. Leap into the portal. You arrive at a strange area - it's a tabletop with candles and giant teacups. Defeat the spiders scurrying about with your jacks. There are strength of will power-ups in the teacups. To get to them, leap onto the chairs - the cushions bounce you onto the platforms inside the teacups. After defeating the spiders, use each cushion to sink each platform inside the teacups. This lowers the clock at the end of the table and reveals a new portal. Enter the portal, then approach the lever in front of you. This makes the time six o'clock! Another portal opens. Leap inside to complete the level.
Hop on each seat cushion to land on the platforms in each cup of tea. About Face Run out to the center of the area and grab the second Jabberwock's eye staff piece After some words from the Cheshire Cat, the Mad Hatter appears, and you must defeat him to continue on. He carries a wide array of weapons, including a missile launcher. To defeat him, circle-strafe around him and stay at a distance. Use the jacks to soften him up. While the jacks are inflicting damage, toss a jackbomb at the feet of the Mad Hatter. At some point during the battle, two automatons emerge from the left and right (temporarily replacing the Hatter). Defeat the automatons with the jacks. The Hatter returns soon after. Make sure you are collecting the meta essence power-ups around the map to restore your sanity and strength of will.
Carefully cross the platforms sticking out of the molten lava. At the end rock, leap up and pull yourself up. Defeat the many fire imps in the area. Traverse the stones sticking out of the lava - again, move very carefully over the stones so you avoid dropping into the hot lava. At the end of the cavern, spot the rage power-up on the left; your destination is the path that leads off to the right. Leap over to the rage if you wish, then move to the right and face the boojum. Leap over the gap (lava and sanity power-ups below) and fight the imps and phantasmagorias. Continue around to the left. Approach the cave to initiate the cutscene with the oracle - it's really the caterpillar! After the discussion, continue to the left. Leap up to the ledges with the meta essence. As you near the base of the structure ahead, turn right and leap across the stones sticking out of the lava. Use the ledges to pull yourself up to higher areas. At the top, battle the fire imps and jabberspawns. Go through the open doors into the portal to complete the level.
This battle against the Jabberwock won't be the last! Jabberwock's Lair It's time to battle the Jabberwock! Take on the Jabberwock as you did the Mad Hatter. Circle-strafe around the Jabberwock, firing the jacks and following them up with jackbombs at the Jabberwock's feet. Don't stand still - keep moving to avoid the Jabberwock's attacks. Locate the meta essence power-ups around the edge of the platform. Jabberspawns will appear and assist the Jabberwock. Defeat the 'spawns easily with jacks and collect their valuable discarded meta essence. The gryphon saves Alice during the battle and scares off the Jabberwock. The final piece of the Jabberwock's eye staff lies in the center of the platform - pick up the eye piece. The gryphon announces he's off to "deal with the Jabberwock." Meanwhile, Alice enters the portal and returns to Caterpillar's Plot.
Locate the loose brick to the right of the Humpty Dumpty look-alike. Caterpillar's Plot, Part 2 Go left and defeat the fire imps and phantasmagorias. Follow the signs into the Majestic Maze area. Kill the card guards and approach the huge vibrating wall. You receive this clue: "Only the Jabberwock's eye staff can pry them open." Cycle through your toys until you hold the Jabberwock's eye staff. Walk against the wall and press the primary fire on the eye staff to bust open the wall. You're automatically sent to the Queen of Hearts Land and into the Majestic Maze.
Pushing the brick next to Humpty opens a secret room that contains the powerful blunderbuss weapon. Before you leave the Caterpillar's Plot, Part 2, there's a hidden weapon that will prove quite effective in the battles to come. At the start of the level, go left and approach the cracked egg "man" sitting on the wall - it's Humpty Dumpty, or at least his close cousin! Look to the right of Humpty and notice the small brick that's poking out from the wall. Push in the brick and approach the closed gate to the right (it's down the decline). At the bottom, you will notice a secret door opening to the left. Enter this door and follow the path to its end. Pick up the blunderbuss weapon. ------------------------------------------------------------------------------------ Majestic Maze Go right from the start and battle the card guards. Follow this path around to the left and tackle the two red card guards before the intersection. At the intersection, go right and around the corner to find a rage power-up. Go left at the next intersection and battle the red card guards under the archway. Go forward past the left turn and down the ramp at the end to the left. You'll eventually find red "exit" portal at the base of an intersection. Go left and down the ramp. Face off against many card guards, a few boojum, and some jabberspawns. Go under the arch and around either the left or right path to the portal. You'll see an insane child hop off a floor plate on the left and enter the portal on the right. With the floor plate up, the gate closes in front of the main portal, which is in the center of the room. To complete the level and open the portal, you must find a replacement child to stand on that floor plate. Enter the portal on the right to return to the red exit portal you passed moments ago. Be ready with a weapon - two jabberspawns wait for your return!
Lure an insane child to the level's exit portal - you'll need him to stand on the floor panel. Turn left out of the portal, then follow the path to the first turn on the left. Follow the hedge path and bypass the staircase on the left. At the intersection, turn right and locate the child in a small alcove on the right. Retrace your steps back to the red exit portal and return down the ramp to the gated portal below. Guide the child onto the floor plate on the left. This opens the gate to the portal ahead of you. Leap through the portal to complete the level.
The exit gate opens once the insane child stands on the floor plate. Combat is extremely difficult on this level. Not only are the hedge paths very tight, making it difficult to maneuver around multiple enemies, but several times jabberspawns and phantasmagorias will also appear behind you, trapping you between dangerous foes. Use the jacks if you have space to retreat. For clusters of enemies, drop a jackbomb and use its alternate fire mode, then finish off remaining enemies with the ice wand or deck of cards. Collect meta essence quickly to restore Alice's sanity and strength of will. Airborne Terror The Cheshire Cat opens the level with a clue: "Ride the thermal drafts." Leap forward and ride the thermal drafts to the platform ahead. As with all drafts on the level, stay on each one for several seconds so Alice reaches full height. Once you're at full height, float over to the next draft. Once on the platform, turn right and defeat the boojum. Leap over the draft and follow the next catwalk around to the right and to the top. You will encounter a few boojum along the way. When crossing the thermal drafts, take care around the steam jets that fire from the left. Turn right at the top and cross the series of thermal drafts. You must be wary of the jets that fire from the left side of the area (note the blowing faces). Stop before each of these jets and let them blow; once they're finished, proceed to the next thermal draft. Once you reach the wooden platform, ascend to the right and tackle the boojum. At the top, turn right and use the drafts to cross to the interior hallway. Walk through the hallway and onto the catwalk outside. Follow this catwalk along the left-hand wall. At the top, spot more thermal drafts blowing to the left. At the next wooden platform, walk to the edge and leap onto more thermal drafts. At the next wooden platform, go left and through the interior hall to the portal at the end. ------------------------------------------------------------------------------------- Mystifying Madness Proceed up the stairs and battle a collection of enemies (including card guards, phantasmagorias, and jabberspawns). Go right at the intersection, take the first right up the ramp, and pick up the jacks in the alcove. Go left, then right under an arch. Explore the first alley on the left to spot a portal behind a closed gate. Your mission is to find a way to open that gate to exit through the portal. Return to the area where you found the jacks. Drop down the hole in the floor and swim to the right, all the way until you reach the end area (you'll spot black card guards on an upper walkway). As you swim, you must use Alice's knife to defend yourself against the attack fish. Also, hug the cavern ceiling to locate the air pockets to restore your air supply (or use the bubbles coming out of the cavern floor). When you reach the end area, locate the walkway along the right wall (you'll spot meta essence power-ups here).
The level's exit gate is closed - you must find the lever to open it! Traverse the rocks on the right wall and leap over to the walkway with the black and red card guards. Defeat them and proceed forward to the lever. Pull the lever to open a gate beneath this structure. Unfortunately, it also closes the exit to the area, so you must find another way around. Take out the automaton behind you. Go to the path across from the machinery and take out the red card guards. Go up the spiral staircase and the catwalk. Follow the path to its end for a large meta essence. Leap into the water up here and swim to the area with the open gate (it's the area you just swam to). Ready your knife to fend off additional fish. Locate the tunnel underneath the structure; the tunnel is on the left side. Swim through the open gate and up the tunnel. Pull yourself up. Walk along the path and defeat the red card guards. At the intersection, go left, then right, then left again across the bridge. Follow the path to a lever. Pull the lever, which opens the gate in front of the portal below your position. Turn around, go right and drop down to the hedge maze below. Turn around again and kill the automaton. Turn left toward the portal and leap in to complete the level.
After pulling the lever, which opens the gate below, drop down and walk through the portal to exit the level. Water Logged The level opens with a hint from the Cheshire Cat: "Turtle proved being a reptile had its advantages." Go right and leap into the water. Use Alice's knife against the fish. Pull yourself up on the walkway to the right to grab the meta essence. Leap back into the water and swim forward and continue to the end. Pull yourself up on the ledges and spot the platform, which operates like a pulley system. Jump onto the pulley and notice that the water rises.
Use the pulley system to raise the water and swim into the open pipes. Swim back to the first area and locate the open pipe (previously unattainable because of the low water level). Swim inside the open pipe and through the holes in the grates. At the intersection, swim right and use the bubbles for air. Swim to the left and up out of the pipe. Ascend to the ledges to find a second pulley. Hop on this second pulley platform to raise the water level again. Jump back into the water and swim to the far open pipe (be careful to avoid or attack the fish). Enter the pipe and stop at the bubbles for air. At the next intersection, swim right for more bubbles. Return toward the left and avoid the underwater fans. Swim along the side opposite the fan to avoid being sucked inside. Swim left and up at the end, avoiding the broken fan blade as you ascend. Pull yourself up at the top. Jump on the third pulley platform, which raises the water around you. Leap over to the meta essence in front of your position . Grab the large meta essence and drop into the water beyond. Swim forward and into the final open pipe. Swim down the pipe and toward the level's exit portal. ------------------------------------------------------------------------------------- Labyrinthine Revenge Drop down and cross the gears to the black card guard. Defeat him and pull yourself up. Go left and eliminate the boojum at the end. Turn left and drop down onto the ledge. Leap across and pull yourself up. Follow the hall to the wheel over the steam vents. Cross the wheel and follow the hall to the machinery. Cross the rotating gears by jumping through the hole. Defeat the automaton and continue across the next gear and through the door at the end. Go right, up the ramp, and then enter the room with the fans above and team on the right. Take out the two automatons in the room. There's a rope in the corner of the room. Ascend the rope to the high ledge that holds a large meta essence. Drop back down into the room and exit up the ramp with the fire imps. Proceed up the next ramp by the water and battle the jabberspawn. Go through the next door and out into the hedge maze. Follow the maze and head toward the ramp down. Defeat the card guards and jabberspawns along the way.
Cross this bridge by sidestepping across. Open the door and spot the tough bridge - steam fires from the left side and a gear rotates overhead. To cross the bridge easily, turn Alice to the side and face the steam jets. This allows you to see the gear turning and avoid getting crushed beneath its teeth. Simply sidestep to the right as you cross and avoid the steam and the gear's teeth. Follow the tunnel to an automaton and a rotating gear adjacent to some thermal drafts. Leap to the catwalk with the jabberspawn. Cross to the next set of thermal drafts. Leap up to the high rotating gear. Leap to the ledge and battle the automatons and boojum. Exit through the doors to the ledge overlooking the rotating gears. Leap on the rotating gear and take on the boojum and card guards on the other side. Leap to the ledge where the black card guard stood. Exit the door into the hedge maze. Follow the path to the crushing heart-shaped spikes. Walk past the spikes carefully. On the other side, turn left and spot the swinging obstacles. Cross to the door and head up the ramp to another set of thermal drafts. Traverse the drafts. At the top, go left or right and cross the bridge blocked by rotating gears. Enter the portal on the other side to complete the level. Machinations Jump to the rotating gear that is in front of your start position. Next, leap to the gears on the right and then to the ledge. Wait for the closest spinning gear to lower. Cross over this gear to the ledge with the meta essence power-up. Once again, wait for the spinning gear to lower. Leap across, then to the next, and finally to the doorway.
Be patient when crossing the spinning gears and pedals. The next area includes a series of spinning pedals. Cross the pedals with careful jumping. At the last pedal, go right, then jump onto the gear. Enter the spinning gazebo-like gear. Jump to the next pedal and ride it above the gazebo. Cross the top of the gazebo-like gear toward the area's exit. In the next area, drop down on the rising gear piece. Leap to the piece that slides left and right. Cross the narrow center bridge and leap on the next rising gear piece. Cross back and forth along the see-saw platforms using the spinning gears to rise to the upper levels. Traverse the central circle to the rising platform. Leap onto the gear that is moving perpendicularly to the circular gear. Cross the upper level touching the gear to the exit portal. This sends you into the game's final area, Queensland, and the next level. ------------------------------------------------------------------------------------- Royal Rage The level opens with a magnificent cutscene of the gryphon battling the Jabberwock. After a dazzling fight, the gryphon falls and Alice must complete the task of destroying the winged menace. The Jabberwock employs a devastating fire breath attack. Avoid it with quick retreat and strafe maneuvers. Use the eye staff in primary fire mode to pummel the Jabberwock when it's in the air or after it has crashed to the ground after missing on its melee attack.
The Jabberwock defeated the gryphon, which forces Alice into the fight! Fire the jacks, then switch weapons to the eye staff to inflict additional damage as the jacks do their damage. Stick close to the edges of the arena to pick up the meta essence power-ups that appear (using the eye staff repeatedly costs a lot of meta essence). Alternatively, you could employ the blunderbuss (if acquired from Caterpillar's Plot, Part 2), though you should be aware that the weapon requires a full load of strength of will in order to fire. Defeating the Jabberwock lowers a drawbridge. Cross it and enter the gate to complete the level. Battle Royale The level opens with the white chess pieces in battle against the Queen of Heart's card guards. Battle Royale is extremely straightforward, though it's one of the most difficult levels you've faced thus far. The entire level is simply one winding bridge with enemies that drop down from above to block your path. The quantity of enemies makes the mission difficult. You must have a lot of patience when crossing the bridge. Eliminate the enemies from a distance and collect their discarded meta essence to restore Alice's sanity and strength of will.
Take your time crossing the Battle Royale bridge, which is cluttered with card guards and other enemies. Use the jacks to soften up the guards (plus it's an excellent use of sanity of will), then fire other weapons while the jacks inflict damage. Move slowly and dodge the projectile attacks from the card guards. You'll find the exit at the end of the winding bridge. Enter to complete the level. Ascension Walk forward to the meta essence and climb up the ledge. Go around the pillar to the right and defeat the two card guards. Walk to where the card guards stood and go left up the ramp. Be careful to turn around and engage the card guard above and behind you. Pull yourself up the next ledge and go to the left. Drop down off the ramp on the right side and spot the interior path. Follow the interior path over the bone bridge, using the ice wand or jackbomb to fend off the card guard attacks while crossing the bridge. Leap up to the ledges on the other side and encounter the fire imps. Drop down to the left and spot the rage power-up. Pick up the rage and quickly go over the ramp on the right and leap over to the rocky platform with the fire imps and large meta essence on the right.
The magnificent entrance to the Castle Keep lies at the top of the level. Go to the left side of the platform (as if you were facing the platform) and locate the cavern. There are many enemies here, so get here before you rage expires. Once inside the cavern, ascend the ledges to the left. Float up the thermal draft. At the top, turn left to the next draft. Float all the way up to the highest meta essence power-up. You may have to steer Alice left and right to avoid the jagged ledges that protrude from the shaft wall. At the top, grab the strength of will and sanity power-ups. Locate the tunnel exit and drop down onto the bridge. Destroy the red card guards standing at the castle entrance. Open the doors to the castle and quickly scamper to the right and pick up the grasshopper tea. With the tea active, you can leap and run quickly past all the card guards. Follow the ramps to the circular lift at the end. Go up the lift to complete the level. ------------------------------------------------------------------------------------- Castle Keep Go through the door and into the chamber. Kill the card guards scurrying about. Drop down into the center recess and notice the mirror facing three paintings - A Tweedle, the Jabberwock, and the Mad Hatter. Return to the upper area and approach the lever. Use the lever to adjust the mirror's position to face one of the paintings. With the mirror facing a painting, leap down and look into the mirror to notice a card suit (such as diamonds, clubs, or spades) inside the painting.
Adjust the mirror to face each painting to learn its suit. You must use the lever two more times to position the mirror in front of the other paintings. Jot down the corresponding suit for each painting, then exit the chamber and return to the start position. Defeat the red card guards that block the path. Go through the tunnels on the opposite side. Locate the small thermal draft and float up to the higher catwalk. Fire the deck of cards at the appropriate painting - complete all three to open the exit door. There are three doors here, each marked with a card suit. Enter each door and walk to the beam of light. Once you're on the beam of light, three paintings (matching those from the mirror room) will be revealed. Shoot the appropriate painting with the deck of cards and the other two will disappear. You must match the suit over the door with the corresponding painting in the room with the mirror. Match all paintings and suits to unlock the door above the mirror room. Return there and proceed over the bridge to the exit. The Cheshire Cat appears for some final words of wisdom - before he's killed! Alice, distraught as ever, must now face the Queen of Hearts alone.
The Queen is powerful. Stay behind the pillars and collect meta essence power-ups until your strength of will is large enough to utilize the Jabberwock's eye staff and blunderbuss weaponry. Hearts of Darkness Walk forward and approach the Queen of Hearts. After a few ominous words, the Queen of Hearts emerges from her throne (connected to the throne by a huge, throbbing tentacle). To defeat the Queen, stay far away so you have a chance to dodge her attacks. Use the pillars for cover, and take advantage of the meta essence power-ups that regenerate nearby. The blunderbuss, if already acquired, will inflict a significant amount of damage upon the Queen of Hearts, but you must have a full stash of strength of will in order to fire the weapon. Toss the jacks at her, then switch to the Jabberwock's eye staff and fire it from a distance. Watch out for the Queen's tentacle and laser attacks. Defeating the Queen isn't the end, though; Alice must face another boss before she regains her sanity and can restore Wonderland.
The final boss! If you don't have the blunderbuss, find it by moving to right from the start position and looking down at the lower platform. You're transported to a ring of platforms. If you failed to procure the blunderbuss from Caterpillar's Plot, Part 2, immediately go right and locate the platform underneath your starting level. Sidestep around the platforms to avoid the beast's attacks. Retaliate with the blunderbuss when full of will or the jacks and Jabberwock's eye staff when not. Defeating the final boss completes the game. Wonderland is restored and Alice leaves the asylum! -------------------------------------------------------------------------------------
Tweedle-Dee off balance.
Alice has Attitude in this new Game.
Alice has a knife and she wants some revenge.
Alice in Queens Castle.
Alice in Mushroom Patch Introduction ---------------- Chapter 1 - General Strategies This section covers general strategies to maximize your potential for success in American McGee's Alice. Combine these strategies with those found in the toys and combat sections of this game guide to further improve your game and your chances to save Wonderland. Be patient with jumping puzzles. Often there's no need to hurriedly jump through a section. So, make sure your footing is good and your landing zone is clear before taking the leap. Use the footsteps icon, which indicates where Alice will land with a standing jump. It's much easier to connect on a standing jump than a running jump. When traversing vines and ropes, ascend (with the "use" key) high on the rope before jumping to the next or to the exit ledge. Being high on the rope ensures that you won't miss the next rope or ledge after a jump. Also, practice swinging back and forth to increase Alice's momentum in the jump. Swinging before the jump is often necessary to meet the distance required by the leap.
Alice in checkerd Room
Another Alice in checkerd Room
Don't leave any path unexplored. Many Alice maps feature secret areas that contain the game's power-ups (grasshopper tea, rage, and so on) and large meta essence power-ups. If you don't explore each inch of the map, you may miss out on these power-ups or sources of meta essence, increasing the
Alice in Wonderland in Red outfit Other power-ups are typically found just before tough areas. For instance, you'll find the mirror (which temporarily makes Alice invisible) before a section littered with red chess piece enemies. If you're having trouble passing a particular section, search for a hidden power-up to assist you or, perhaps, an alternate route.
Alice in Wonderland ripped Purple Dress
The original video games of the 1980's were more to do with imagination and whimsy such as the 1864 fable, Alice in Wonderland. Now there is the Video Game by American McGee's Alice. by Electronic Arts
much like falling into a hole... Enjoy these twists... and turns... of yesteryear 1864 or bust.
Or go back to Walter Day Conversations
Alice in Wonderland - Disney Fables The Disney Movie: (Year 1951) Over (50) years ago: Originally, Walt Disney released Alice in Wonderland in 1951, but you dont feel like its an old film when you watch it, just like many Disney classic animation films. They are so well executed that its hard to find a flaw in them. This story is a treat for animal lovers, as its filled with strange, adorable and funky creatures of which my favorites were the Mome Raths, small, furry little multi-colored thingies that crawl around. Classic characters such as the White Rabbit, the Mad Hatter, the Hookah-smoking Caterpillar, the Cheshire Cat, the Queen of Hearts, the talking flowers, and more, all delight us with their funny weirdness.
THE MAKING OF (THE ORIGINAL) ALICE IN WONDERLAND (YEAR 1864) Over (150) Years Ago. AND CURRENT AND CLASSIC PICTURES UP TO (2004) About the Author: Rev. Charles Lutwidge Dodgson, third of eleven children of an Anglican priest, was a mathematician and a logician who was a lecturer at Oxford for some 26 years. He was also an accomplished photographer, and a Church Deacon. Dodgson's pen name, (and the name by which you will undoubtedly know him best), was Lewis Carroll. He is best known for his whimsical tales, Alice's Adventures in Wonderland and Through the Looking Glass. Lewis Carroll - 1832-1898 Rev. Charles Lutwidge Dodgson. In Carroll's original (1862-1864) manuscript for the story, Alice's Adventures Underground, which he personally illustrated, Alice was not the little blonde girl in a pinafore we have come to know from subsequent illustrations.
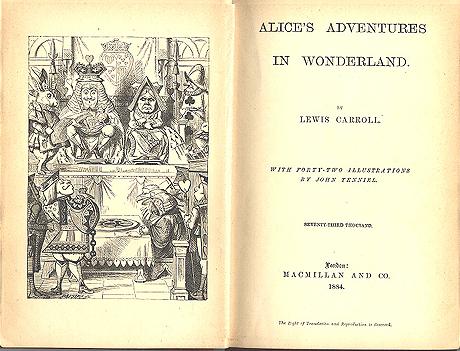
Alice Pleasance Liddell (The Real Alice)
She was the inspiration for the the child. She was originally a winsome, dark haired child, whose likeness had been patterned after ten year old Alice Pleasance Liddell, the child of a church colleague, for whom the Alice stories had been originally created.
July 4th in 1862. Dodgson first told the story during a pleasant summer outing with friends. Reverend Dodgson, along with a Christ Church colleague, Robinson Duckworth, and the three young daughters of the Dean of Christ Church at Oxford, (Alice, Lorina, and Edith Liddell), in a rowing boat. ----------- Three Little Girls: 1) Lorina Charlotte Liddell (aged 13) - Oldest Liddell girl. 2) Alice Pleasance Liddell (aged 10), was the inspiration for the heroine: Middle Liddell girl. Alice Liddell was chosen for the children's classic Alice's Adventures in Wonderland by pen name of Lewis Carroll, Writer, Reverand. 3) Edith Mary Liddell (aged 8) - Youngest Liddell Child Alice Pleasance Liddell


All Photography by Charles Dodgson (Lewis Carrol) (British, 1832-1898)
Alice Constance
Alice Constance
Beatrice Henley (1875)
Irene MacDonald (1877)
Alice Liddell with coat
Xie Kitchin Charles Dodgson (Lewis Carrol) (British, 1832-1898) Xie Kitchin (detail) ca. 1875 Albumen print, 11 x 17cm Private Collection, courtesy of the Fraenkel Gallery, San Francisco
Aileen Wilson-Todd
Mr. & Mrs. Millais and two daughters
Two Children Playing make beleive
Child with summer hat
Ellen Terry
Maria White

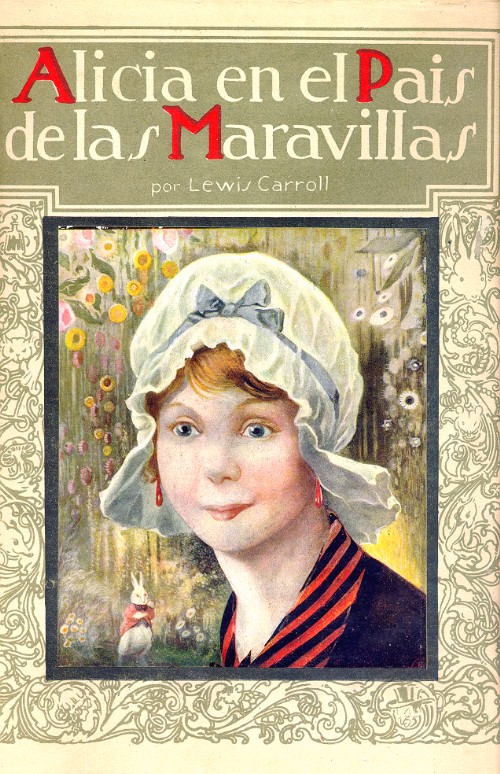
Alice - Beyond The Looking Glass
Alice Liddell
Edith, Lorina, Alice Liddell
Alice Liddell
Lorina and Alice Liddell
Alice Liddell Part of this photograph was used on the last page of the manuscript Alice's Adventures Under Ground, presented to Alice as a Christmas gift in 1864.
Alice Liddell Lorina and Alice Liddell 1860
Alice Liddell 1860
Alice Liddell ------------- Alice's Adventures in Wonderland by Lewis Carroll: Only 22 copies of the 1865 first edition are known to exist today - 17 are in libraries and just five, including the copy just sold, are in private hands. --------------
Alice Liddell
Alice Liddell
Alice Liddell
Amelia Shankley
Alice Liddell
Alice Liddell
Alice Liddell All Photography by: Charles Dodgson (Lewis Carrol)
Edith, Lorina & Alice liddell (1859)
Alice Liddell (1859)
Alice Liddell (1859)
Alice Liddell (1859)
Alice Liddell (1859)
Alice Liddell (1859)
Alice Liddell (later)
Alice Liddell A Closer look at Lewis Carroll, nude photographer, mathmatician, writer: Under The Magnifying Glass Nude photographs. An enthusiastic amateur photographer, Dodgson took thousands of pictures, many of them portraits of his little friends. Perhaps above all else, it is a portrait of a man emotionally focused on pre-pubescent female children; a man who sought comfort and companionship exclusively through serial friendships with "little girls", and who almost invariably lost interest them when they reached puberty.Everybody was clothed at first, but in the late 1870s, when Dodgson was in his mid 40s, he tried to shoot some of the girls in the buff--not an easy thing to arrange. He did a few nude studies of young female models and went prospecting among the families of his friends and acquaintances. In 1879 Dodgson sent several curious letters, republished a while back in Harper's, to the family of Andrew Mayhew, an Oxford colleague. He asked permission to take nude photographs of the three Mayhew daughters, ages 6, 11, and 13, with no other adults present. When the parents nixed the idea of no chaperone, Dodgson lost interest. He did succeed in doing nudes of other girls, but usually by agreeing to let their moms hover nearby. In 1880 Dodgson gave up photography forever. Too much heat? Nobody knows, although around the same time he got flak for kissing one of his girl friends. At any rate the nude photos and plates were returned to the families of the subjects or destroyed on his death. It was long thought that none survived. But then four turned up. For this we can thank Morton Cohen, who unearthed the photos and published them in his Lewis Carroll: A Biography (1995). One is of a little girl named Evelyn Hatch in a pose that, were Evelyn older or Cecil weirder, would be seductive. As it is I can imagine Evelyn's parents' thinking: that Rev. Dodgson, he is one amusing fellow. But he'd better keep his mitts to himself. --CECIL ADAMS by: Rick Fehrenbacher It is easy to see that the author posses the children in quite subductive stances, and the age of the models were very young. You might wonder if there are any alternative motives behind such photographs. There was mention of the entire family leaving abruptly after Alice Liddell turned 11 years old. They did not keep in contact with Lewis Carrol and I suspect that they left quickly because that thought that Lewis Carrol might be going to far with his photography of very young nude models. If it were not for Lewis Carrols fettish we probably not have had the whimsical Alice and Wonderland stories. In 1879, Carrolls diaries show what Colin Ford describes as "a positive crescendo of activity" in photographing young girls naked. Frances Henderson was "in her favourite dress of nothing"; next day, little Leila Taylor "in jersey and bathing drawers". Then Frances alone, "lying on a blanket, naked as usual". On July 25, his model was Evelyn Hatch "naked - a kind of photograph I have often done lately". He repaid his models with kisses, taking them up on his knee to do so, and in fact the lips of many of the children in his photographs seem pursed ready to give or take a kiss." -- Daily Mail & Guardian ----------- Dodgson entertained his fellow row boat passengers, (Alice and her two sisters) as they sat in the stern of the boat, with a story he created on the spur of the moment for 10 year old Alice. Alice and her sisters were enchanted with the tale, and Alice later pleaded with Carroll to commit the story to paper, which he did, but he did not complete it until until the following February. This first manuscript, which was called Alice's Adventures under Ground is thought to have probably been destroyed in 1864 when, on November 26th 1864, Dodgson presented Alice Liddell with a more elaborate hand-printed second version (shown at right) which included 37 of his own illustrations as a Christmas present. First Edition, "Alice's Adventures Underground"
A Christmas present to the real Alice, "Alice Liddell" The manuscript, entitled "Alice's Adventures Underground" was presented to Alice Liddell, inscribed as "A Christmas Gift to a Dear Child, in Memory of a Summer Day".
Third Edition: Alice's Adventures in Wonderland The third version was published by Macmillan and Co. in London, on July 4th, 1865. Sir John Tenniel was the artist who agreed to illustrate the revised and expanded text which was now called Alice's Adventures in Wonderland.
Anonymity: New Pen Name: Preferring anonymity for this whimsical work, since he had a professional reputation for producing more serious tomes, Reverand Charles Lutwidge Dodgson, author, chose to use the nom de plume or "pen name" of Lewis Carroll on his work.
Version Four: In March 1885 Dodgson obtained the now married Alice Liddell Hargreaves' permission to allow Macmillan to publish a facsimile of the manuscript of Alice's Adventures under Ground; and this appeared on December 22nd 1886 in an edition of 5,000 copies.
In 1871 Carroll published Alice's further adventures in "Through the Looking-Glass, and What Alice Found There". The tales "Hunting the Snark" and "Sylvie and Bruno" were amongst his later works.

Do these books have hidden meanings? In addition to laudatory fame, Carroll and his work also drew the predictible cadre of jealous attackers. Detractors began searching for hidden meanings in his writings, (sparking debates that still rage today), to the point that Carroll sought to distance himself from the books.
In an 1876 letter to readers Carroll implored them to read "Wonderland" in the "spirit in which I have written it."
The man who was described by one of his illustrators as "an interesting but erratic genius", and by another as "impossible!", died in 1898 at the age of 66.

Alice and Wonderland - Review Alice's Adventures in Wonderland is one of the most clever and entertaining books yet written. The author's use of language is extremely appealing to the younger readers. These young readers are attracted to this book because of the author's use of many songs. For instance the lullaby sung by the duchess to her child. The Mock Turtle also sang to Alice and the Gryphon a song about the Lobster Quadrille. The author also uses poems that are entertaining and fun to listen to. "You are Old Father William" is one of the many poems. Not only does the author use poems but she also uses commonly known poems and changes the words to fit the character saying them. For instance the Mad-Hatter sings Twinkle Twinkle Little Star in different words saying "Up above the world you fly, Like a tea-tray in the sky." If this isn't a unique way of writing I dont know what is. Another style of her writingthat is appealing is when she creates a picture, using words in a poem, about the poem. Yhis is used on page 37. The words in the book are nbot hard so the book can be enjoyable when it is being read, not stressful. The author brings animals to life which is an interesting style of writing. This is Lewis Carroll's style of writing. The main character in this book is a little girl with blonde hair named Alice. This child is full of fantasies and dreams, which is what the book is about. Alice is very curious and likes to know every little detail. She thinks she is very smart. For example, when Alice is listening to the Dormouse's story she asks questions like "What did they live on," and makes smart comments such as "They could not have done that you know, they'd have been ill." She is also a little bit bratty, especially to the Dormouse when she says: "Nobody asked your opinion." These characteristics pull together to make an interesting main character and to create a fabulous story. The theme of the story is sometimes you need to take a break out of every day life and dream of fantasize. This makes your life more interesting even if you dream about things that will never come true. Alice does this when she dreams about changing sizes and listening to talking animals. Dreaming doesn't hurt anyone except the people who don't do it. If nobody ever had dreams life would be extremely stressful and boring. The plot of the story is all about Alice trying to find the white rabbit, which of course is in her dream. Following the white rabbit takes ALice to interesting places, such as the Courtroom filled with animals, and the Duchess' house, along with meeting interestingpeople such as the Cheshire-Cat and the Queen. This amazing cat he's the ability to disappear whenever it wants to and it always smiles. In the end Alice finds the white rabbit and then wakes up from her dream. This is the plot of the story. The story is effective to the reader. This is so because after listening to such acreative dream and fantasy, it inspires people to take a little time out of the day and be creative and dream once in a while. All the parts of this five star story; the writer's style, the main character, the theme, and the plot; come together to create the overall effectiveness of the story.
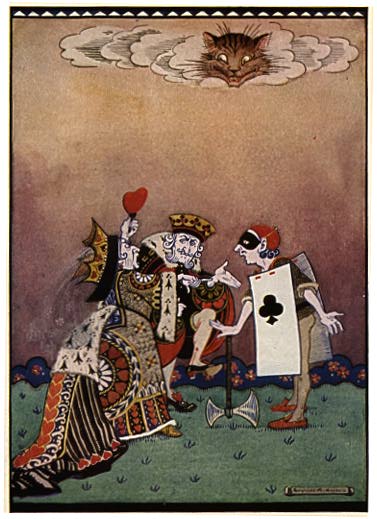
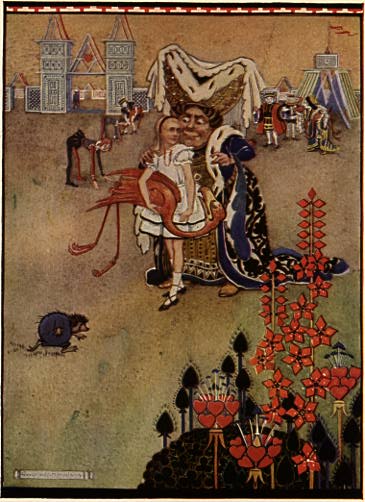
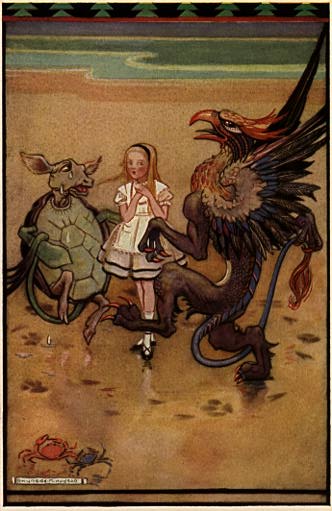


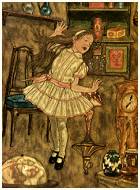
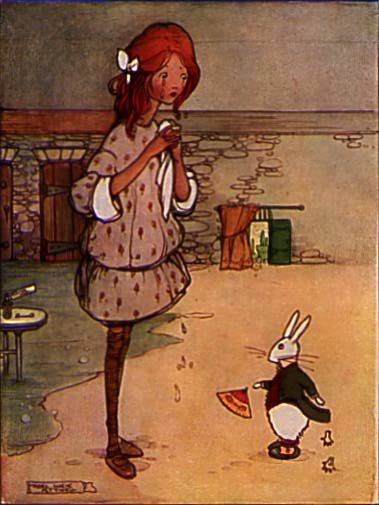
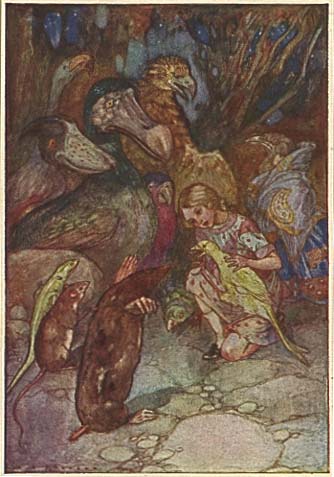
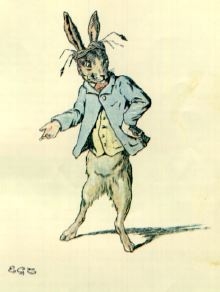
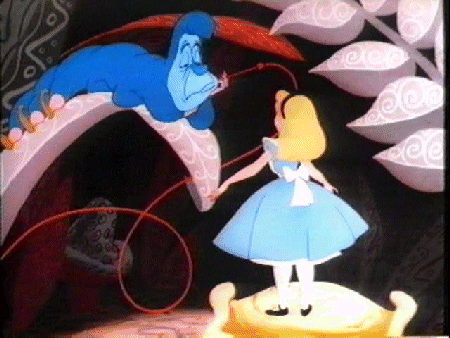
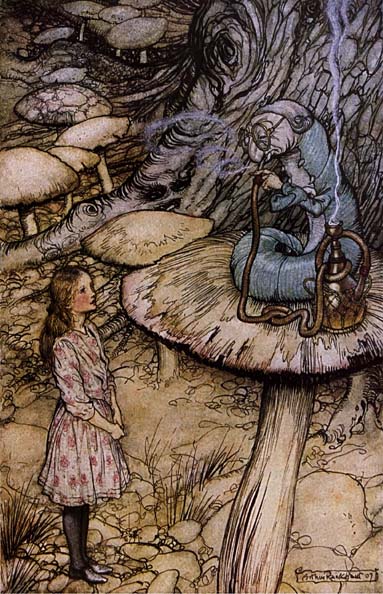
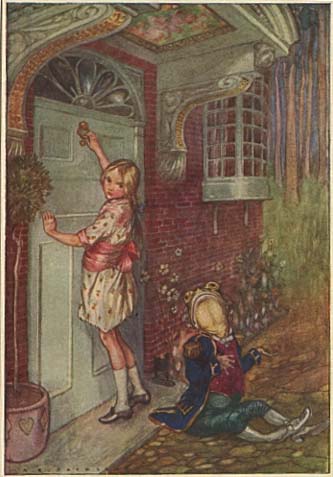
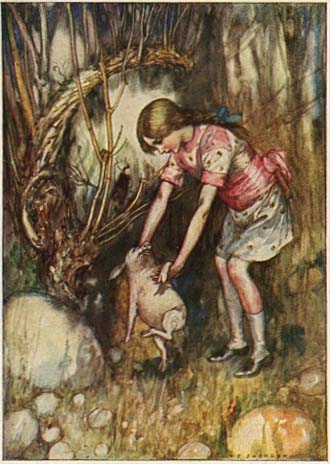
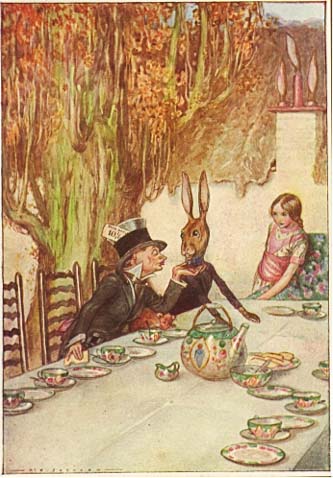


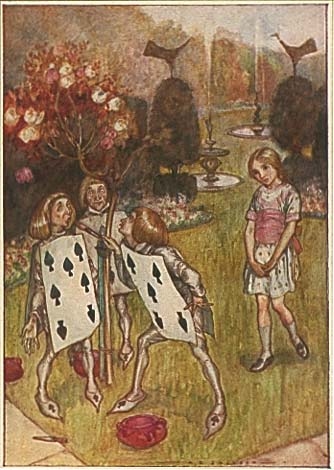
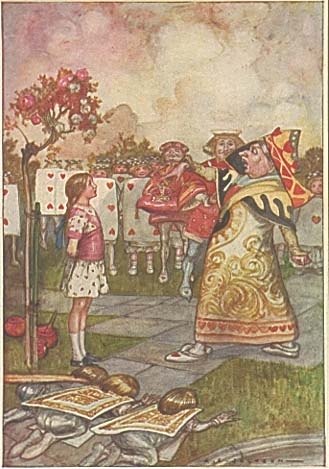
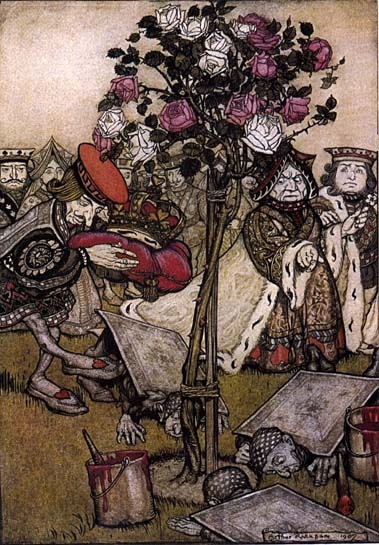

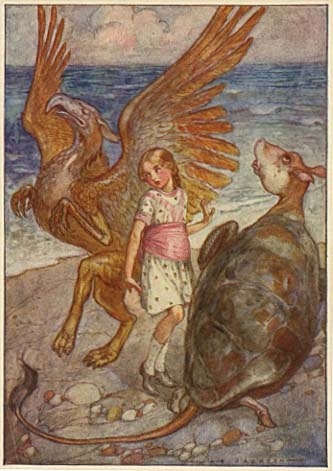
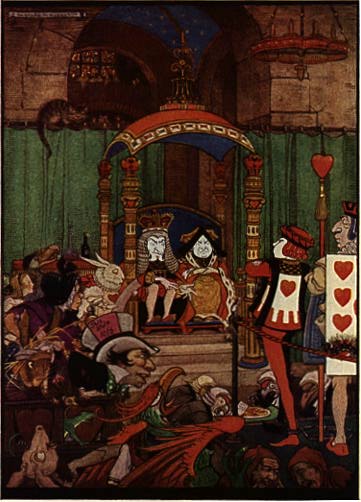
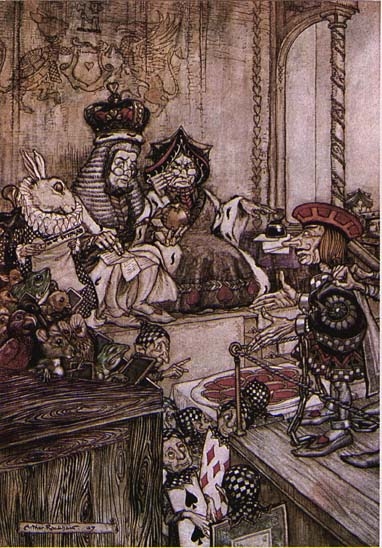

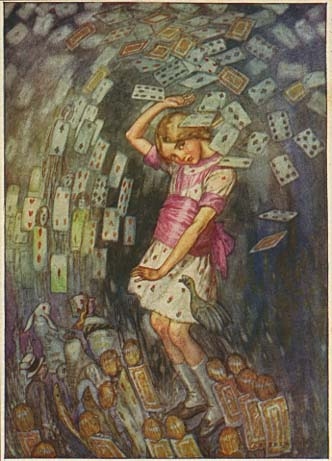

1111111111111
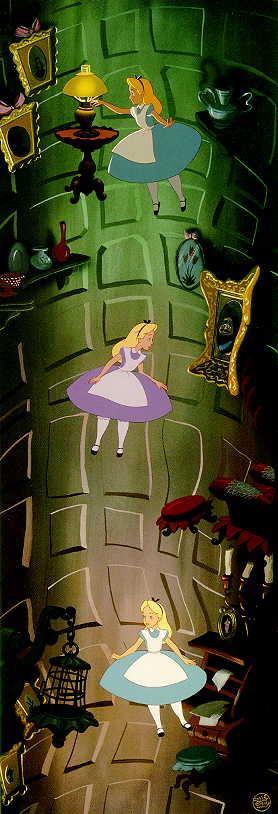

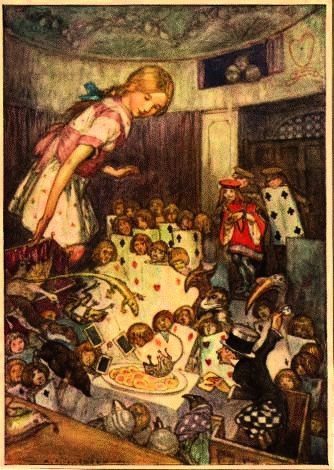


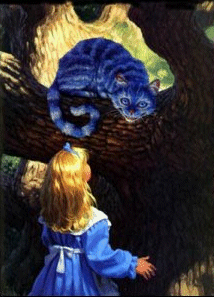
When Lewis Carroll wrote "Through the Looking Glass", John Tenniel objected to a chapter, so Carroll dropped the entire episode. This chapter was called "A Wasp in a Wig". For more than 100 years it was lost. Now the last chapter has been found!
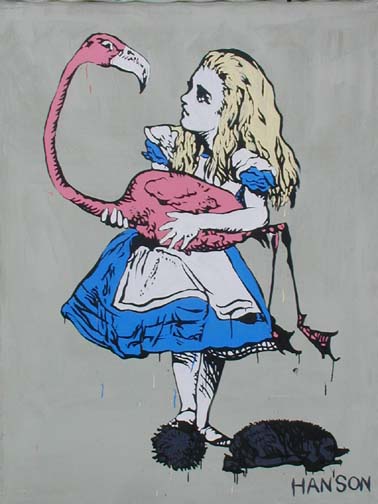


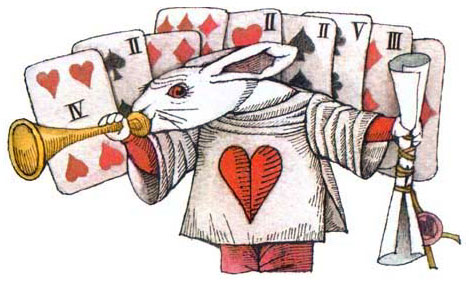


Click On Alice To LeaveLeave Alice in Wonderland All in the golden afternoon Full leisurely we glide; For both our oars, with little skill, By little arms are plied, While little hands make vain pretence Our wanderings to guide. Ah, cruel Three! In such an hour Beneath such dreamy weather, To beg a tale of breath too weak To stir the tiniest feather! Yet what can one poor voice avail Against three tongues together? Imperious Prima flashes forth Her edict to begin it In gentler tone Secunda hopes There will be nonsense in it! While Tertia interrupts the tale Not more than once a minute. Anon, to sudden silence won, In fancy they pursue The dream-child moving through a land Of wonders wild and new, In friendly chat with bird or beast And half believe it true. And ever, as the story drained And faintly strove that weary one The rest next time--It is next time! The happy voices cry. Thus grew the tale of Wonderland: Thus slowly, one by one, Its quaint events were hammered out-- And now the tale is done, And home we steer, a merry crew, Beneath the setting sun. Alice! a childish story take, And with a gentle hand Lay it where Childhoods dreams are twined In Memorys mystic band, Like pilgrims witherd wreath of flowers Pluckd in a far-off land. THE END


-------------------------------------------------------------------------------- End of Page =========
Click At Desired Graphic Text For Each Introduction
Biography Commentary Questions
Click On Below Graphic Text For Spy Hunter Introduction
Tournament and Guinness Book Results From 1983-2004
Click On Below Graphic Text For All Video High Scores thru 2004
The Golden Era
Click On Below Graphic Text For Material On The Golden Years Of Video Games 1980's
Click the Below Graphic Text to read my Conversations With Walter Day
June 9, 2004 Walter Day states, "No Replay Necessary" for Paul Dean
Find A Video Game Auction Near You
Home Page
----------------- END OF PAGE
New Horizons Computer Learning Centers


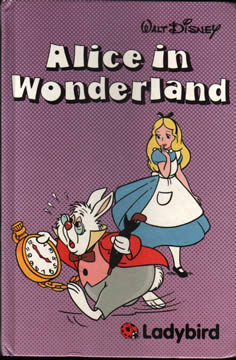
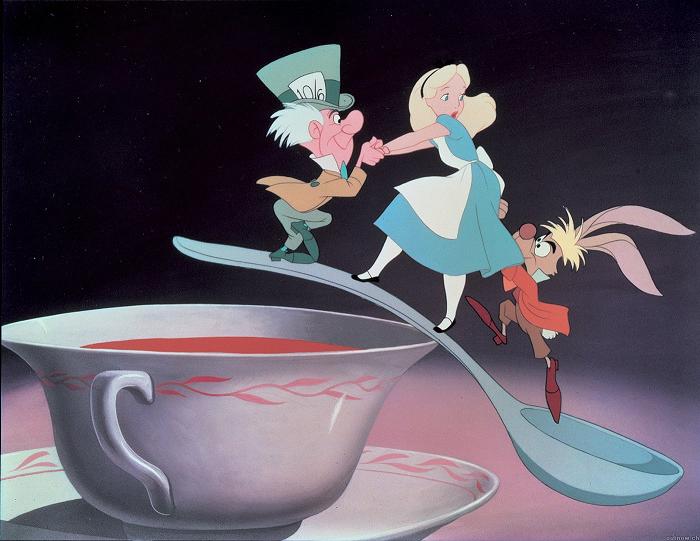


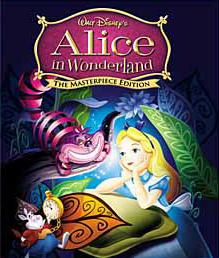
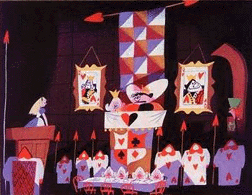
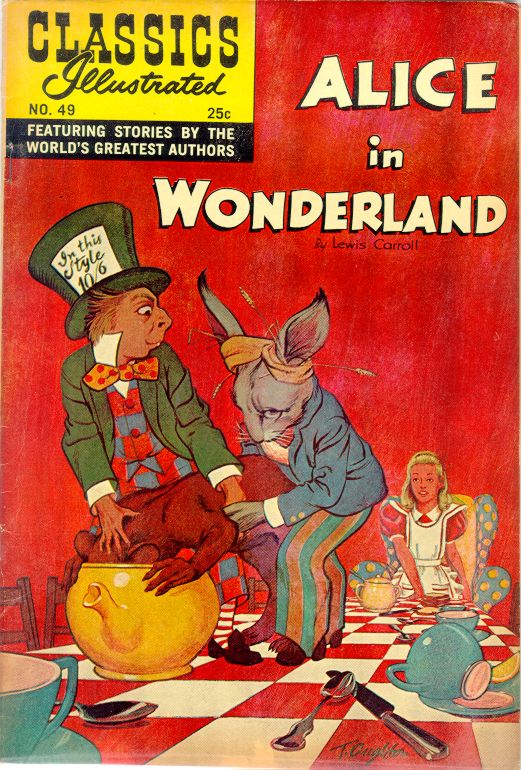
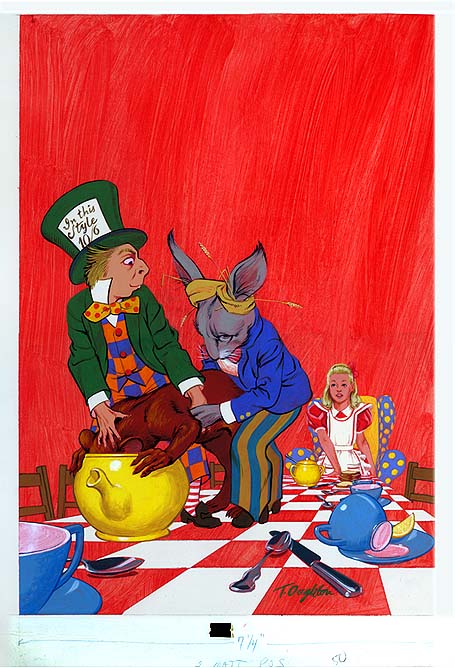
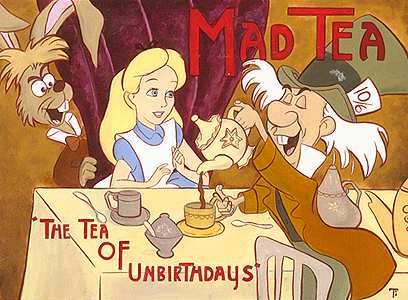
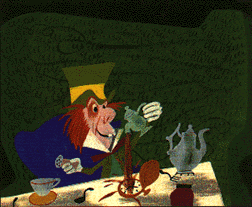
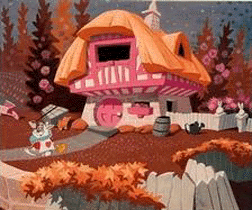

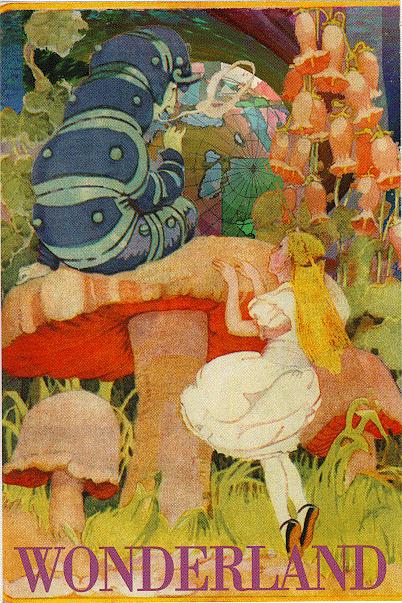
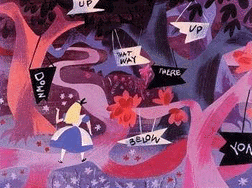

